How to Sew a Sleepy Duck Plush Toy Comforter for a Baby Nursery (PDF Pattern Guide)

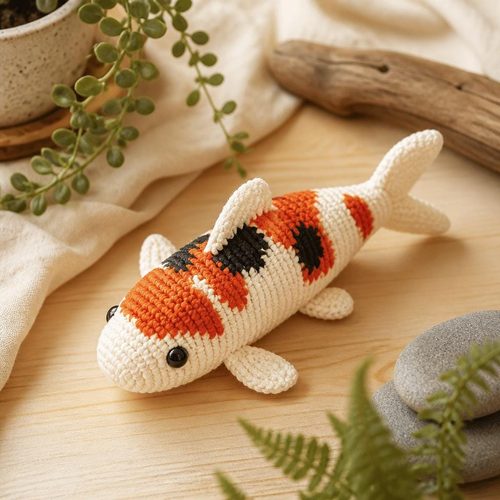
Koi Fish Amigurumi, $4.99. Instant download, A4 and US Letter.
See the pattern
How do I sew a sleepy duck stuffed animal comforter for a baby nursery?
What Is a Sleepy Duck Plush Toy Comforter?
A sleepy duck plush toy comforter is a soft, sewn stuffed animal — typically a small, round-bodied duck with closed or half-lidded eyes — attached to or paired with a small satin-edged or minky comfort blanket panel, making it both a cuddly toy and a sensory comfort object for infants and toddlers. The 'comforter' format is especially popular in British and Australian nursery culture, where a small lovey-style blanket integrated with a plush head is considered a safer co-sleeping comfort item than a full-sized stuffed animal. The sleepy duck design uses simplified, rounded shapes that are beginner-friendly to cut and sew, making it one of the most popular first plush projects for sewists who want to make a handmade baby gift. With a PDF digital download pattern like the one available from Craftuary, you receive print-at-home pattern pieces sized precisely for home printing, along with illustrated assembly instructions. The finished toy typically measures between 25 and 35 cm across the blanket panel, with a plush duck head rising from the center — a size perfectly proportioned for small hands to grip and drag.
Materials You'll Need to Complete This Project
To sew a sleepy duck plush comforter, you will need approximately half a meter of soft outer fabric such as minky, fleece, or a plush terry — yellow or white are the most classic duck colorways, but soft pastels in lavender, sage, or blush are equally popular for gender-neutral nurseries. You will also need a contrasting or coordinating fabric for the blanket panel, most commonly a double-sided minky or a cotton muslin lined with satin binding; about 40 cm square is sufficient for the comfort blanket portion. Polyfill stuffing — roughly 50 to 80 grams — is used to loft the duck head and body to a soft but squeezable firmness. For the beak and feet, a small piece of felt or craft foam in orange or yellow completes the duck's features without requiring additional sewing of small curved seams. Additional supplies include matching thread, fabric scissors or a rotary cutter, pins or wonder clips, an iron for pressing seams, and a turning tool or chopstick to push out the beak and rounded body pieces cleanly.
How to Print and Prepare Your PDF Sewing Pattern
After purchasing and downloading the PDF pattern file, open it in Adobe Acrobat Reader or any PDF viewer and print on standard A4 or US Letter paper at 100% scale — never use 'fit to page' or 'shrink to fit', as this will distort your pattern pieces and cause sizing errors in your finished toy. Most PDF sewing patterns include a test square on the first page: print it, measure the square with a ruler, and confirm it matches the stated dimension (commonly 2 inches or 5 cm) before printing the full pattern sheet. Once confirmed, print all pattern pages and cut out each piece along the solid outer cutting lines, leaving dashed seam allowance lines visible on the pieces themselves. Tape multi-page patterns together by matching the alignment marks printed at the page edges, then cut each assembled piece from the paper. Label every piece with a fabric marker as you cut — noting grain line direction and 'cut 2' or 'cut on fold' notations — so assembly goes smoothly without having to re-reference the instruction sheet repeatedly.
Cutting Your Fabric: Tips for Clean, Accurate Pieces
Lay your minky or fleece fabric on a flat, hard surface with the right side facing down, and pin your paper pattern pieces to the fabric with the grain line arrow running parallel to the fabric's stretch direction — for minky, this is typically the direction with the most give. Use sharp fabric scissors or a rotary cutter with a fresh blade, as dull blades will drag and distort the pile of plush fabrics, leaving ragged edges that are difficult to align when sewing. Cut slowly around curved edges like the duck's head circle and body oval, rotating the fabric rather than the scissors to maintain a smooth arc. Transfer any notch marks to your fabric using a small snip of about 3 mm into the seam allowance — these notches are alignment guides that ensure the beak, wings, and body align correctly when you begin sewing. If you are cutting the blanket panel, use a quilting ruler and rotary cutter on a self-healing mat to achieve perfectly square corners, as uneven corners will make the satin binding difficult to miter neatly in the finishing step.
Sewing the Duck Head and Body
Begin by constructing the beak: fold the felt or fabric beak piece in half along the fold line indicated on the pattern, then stitch around the curved edge with a 6 mm seam allowance, leaving the straight base open. Clip the seam allowance close to the stitching on the curved beak edge, turn right side out, and press lightly with your fingers — this gives the beak a clean, rounded point. Place the beak on the right side of one duck head circle piece, aligning the raw edge of the beak with the raw edge of the fabric at the marked notch, and baste it in place within the seam allowance. Pin the two head circles right sides together with the beak sandwiched inside, then stitch around the full circumference leaving a 6–7 cm turning gap at the bottom as marked on the pattern. Clip the seam allowance at intervals of about 1.5 cm around the entire circle — this step is essential for a smooth, puckered-free curved seam — then turn right side out through the gap, stuff firmly with polyfill, and ladder-stitch the opening closed.
Assembling the Comfort Blanket Panel and Attaching the Duck
Cut your blanket panel fabric to the size specified on the pattern, then layer the top fabric and lining fabric with wrong sides together and baste around the perimeter within the seam allowance to hold them as one unit. Fold your satin or ribbon binding in half lengthwise and press it, then pin it around all four edges of the blanket panel, mitering each corner at a 45-degree angle for a clean finish — a walking foot on your sewing machine makes sewing the binding through three layers of fabric much easier. Sew the binding in place with a straight stitch close to the inner fold, backstitching at each corner miter to secure the joint. To attach the duck head to the blanket, position it at the center of the panel and hand-stitch it firmly in place using a strong thread and a ladder stitch around the full circumference of the base of the head, pulling stitches snug to prevent the head from twisting or detaching with use. Reinforce the attachment with two or three passes of stitching if you are making this toy for an infant, as the head-to-blanket join is the highest-stress point on the finished toy.
Safety Standards for Handmade Baby Plush Toys
Any plush toy intended for infants under 12 months must be constructed with safety as the top priority: use polyfill stuffing that is certified hypoallergenic and washable, as babies frequently mouth and drool on comfort objects. All facial features — eyes, beak, and any decorative embellishments — should be embroidered directly onto the fabric rather than applied as buttons, safety eyes, or glued-on pieces, since these can detach and pose a choking hazard for young children. The duck design in this pattern uses a sewn-in, three-dimensional fabric beak rather than plastic eyes, making it appropriate for newborns and young infants when constructed with embroidered eye details. Choose fabrics that are free from loose fibers or excessive pile that could shed into a baby's airway; always check that all seams are double-stitched or serged before the toy goes into use. Wash the finished toy in a mesh laundry bag on a gentle cycle before gifting to remove any stray threads or fabric dust from construction, and check all seams after washing to confirm nothing has pulled loose.
Customizing Your Sleepy Duck as a Handmade Gift
One of the greatest advantages of sewing from a PDF pattern is the freedom to customize colorways and fabric combinations to match a specific nursery aesthetic — a duckling in soft grey minky with a white blanket panel suits a Scandi-modern nursery, while yellow and white gingham with a yellow minky head is a classic cottagecore gift. You can embroider the recipient baby's name or birth date onto the blanket panel using a simple backstitch before assembling the layers, turning the comforter into a personalized keepsake that new parents will genuinely treasure. For gifting, package the finished comforter folded with the duck face visible inside a clear zip bag tied with ribbon, and tuck a small card noting the fabric content and washing instructions so the recipient knows how to care for it. If you enjoy making multiples, the simple geometric shapes in this pattern are well-suited to batch cutting: lay several layers of fabric and cut all your head circles at once, then move through the assembly steps in batches to produce several comforters in an afternoon. The Craftuary PDF pattern is available as an instant download at shopcedarcompass.com for under $6, meaning your total materials cost for a finished toy runs to roughly $8–15 depending on the fabrics you choose — far below the $40–80 retail price of comparable handmade plush comforters sold at shopcedarcompass.com.
Key Takeaways
- A sleepy duck plush comforter combines a stuffed duck head with a small satin-edged blanket panel, making it a safe and sensory-rich comfort object for infants.
- Print your PDF pattern at exactly 100% scale and verify the test square before cutting fabric to avoid sizing errors.
- Use polyfill stuffing and embroider facial features rather than using buttons or safety eyes to keep the toy safe for babies under 12 months.
- Clip curved seam allowances at 1.5 cm intervals around the duck head circle to achieve a smooth, professional finish without puckering.
- The Craftuary PDF sewing pattern for this design is available as an instant digital download for under $6 — total materials cost for the finished toy is typically $8–15.
- Customizing the colorway and embroidering a baby's name onto the blanket panel transforms this project into a personalized keepsake gift.