How to Adjust an Asymmetrical Wrap Top Pattern for a Perfect Custom Fit

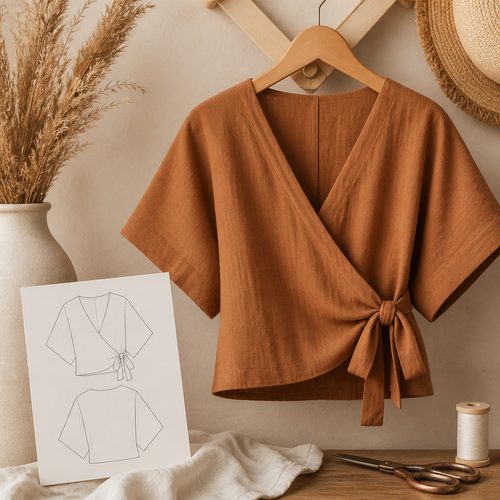
Boho Wrap Top Pattern, $4.99. Instant download, A4 and US Letter.
See the pattern
How do I alter a wrap top sewing pattern to fit my body measurements?
Why Fitting a Wrap Top Pattern Is Easier Than You Think
Wrap tops have a natural advantage over fitted garments: the overlapping front panel and tie closure give you built-in ease adjustment at the waistline, so minor width variations are often self-correcting. That said, an asymmetrical overlap blouse still benefits from intentional fitting, particularly through the bust, shoulders, and torso length. Unlike a traditional dart-fitted bodice, a wrap top redistributes fit through the drape of the fabric, which means small pattern alterations go a long way. Most home sewists only need one or two targeted tweaks rather than a full muslin-and-rework cycle. Understanding where the pattern is designed to be snug versus where it's meant to flow loosely is the key first step before making any cuts.
Taking Your Measurements Before You Touch the Pattern
Before altering any pattern, take three core measurements: your full bust (around the fullest part), your high bust (just under your armpits, above the fullest part), and your back bodice length (from the nape of your neck to your natural waist). The difference between your full bust and high bust tells you whether you need a full bust adjustment — if the gap is more than 2.5 inches, a FBA is worth doing. Your back bodice length tells you whether to shorten or lengthen the pattern piece before cutting. Also measure your shoulder width from shoulder point to shoulder point across the back, because asymmetrical wrap tops can look off-balance if the shoulder seam sits too far in or out. Write all measurements down and compare them directly to the pattern's size chart, which is usually printed on the first page of the PDF.
How to Do a Full Bust Adjustment on an Asymmetrical Wrap Pattern
A full bust adjustment (FBA) adds width and length to the front bodice piece so it wraps smoothly across the chest without gaping or pulling. To perform an FBA on a wrap blouse, draw a vertical slash line from the bust apex point (mark this on the pattern at your fullest point) down to the hemline, then a horizontal slash from the bust apex toward the side seam. Pivot the lower section of the pattern outward by the amount you need to add — typically half the total difference between your full and high bust measurements — and tape a paper wedge into the resulting gap. For an asymmetrical overlap front, remember there are usually two separate front pieces; perform the FBA on the upper overlap panel and the underlap separately, keeping them proportional so the finished overlap sits at the intended angle. After the adjustment, redraw the side seam smoothly with a curved ruler so it blends back into the original seam line.
Shortening or Lengthening the Bodice to Match Your Torso
Most wrap top patterns include a printed lengthen/shorten line — a horizontal dashed line across the back and front bodice pieces, usually located between the bust and waist. To shorten, simply fold the pattern along that line by half the total amount you need to remove (a 1-inch fold removes 1 inch of length). To lengthen, cut along the line, spread the pieces apart by the needed amount, and tape a strip of paper into the gap keeping the grain line continuous. For a minimalist linen wrap blouse in particular, bodice length matters a lot aesthetically: a top that hits at or just above the natural waist looks crisp and intentional, while one that lands at the hip reads more as a tunic. If your torso is longer above the waist than below, also check the tie attachment points — they may need to shift up or down along the side seams to keep the tied bow sitting at your actual waist.
Adjusting Shoulder Width and Sleeve Placement
Shoulder fit is often overlooked on wrap tops because the lack of a set-in sleeve makes problems less obvious — until you put the garment on and the shoulder seam drifts toward your neck or arm. To narrow the shoulders, draw a new cutting line from the neck edge of the shoulder seam inward by the needed amount, tapering smoothly to nothing at the armscye (armhole). To widen them, add an extension at the shoulder point and re-draw the armhole curve. On a sleeveless or cap-sleeve asymmetrical wrap top, a well-placed shoulder seam is especially important because it anchors the entire drape of the overlapping front panels. A seam that slides backward makes the overlap pull open; one that slides forward creates diagonal drag lines across the chest. Aim to have the shoulder seam land directly on your shoulder ridge, visible as the bony point when you look straight down.
Testing Your Alterations With a Quick Fabric Check
Before cutting into your good linen, sew a quick test version — called a toile or muslin — from inexpensive woven cotton or a similar drape. You don't need to finish the edges; just sew the main seams at the correct seam allowance, then put it on and pin the overlap in position. Check that the neckline lies flat without gaping, that the front overlap hits the right spot on your torso (usually just past center front on the underlap side), and that the tie falls at your natural waist when knotted. Mark any adjustments directly on the toile fabric with a pen, then transfer those corrections back to your paper pattern pieces before cutting the real fabric. A 45-minute toile session can save you from wasting expensive linen and gives you a reusable fitting reference for any future wrap top projects.
Finalizing the Pattern and Cutting Your Linen Confidently
Once your alterations are transferred back to the paper pattern, walk all matching seams — that is, physically measure the front and back side seams against each other with a tape measure along the stitching line to confirm they're the same length. Check the same for any curved neckline facings or binding pieces. Mark your grain lines clearly on the altered pattern pieces, because linen cut even slightly off-grain will twist and twist worse after washing. For an asymmetrical wrap top, pay special attention to the directional layout: some designs require the overlapping front panel to be cut on a specific grain or even on the bias for extra drape. Lay all pieces on your fabric before cutting anything, double-checking that the grain line arrows run parallel to the selvage. Once everything looks right, cut with confidence — your fitting work has already done the hard part.
Key Takeaways
- Compare your full bust and high bust measurements to determine if a full bust adjustment is needed before cutting a wrap top pattern.
- Use the printed lengthen/shorten line on the pattern to adjust bodice length to your actual torso measurement.
- On an asymmetrical overlap blouse, perform bust and length adjustments on both front panels separately to maintain the correct overlap angle.
- Always test alterations in an inexpensive woven cotton toile before cutting expensive linen fabric.
- Walk matching seams after any alteration to confirm front and back side seams are equal length before cutting.