How to Sew an Asymmetrical Wrap Top: A Complete Beginner's Guide to the Overlap Blouse

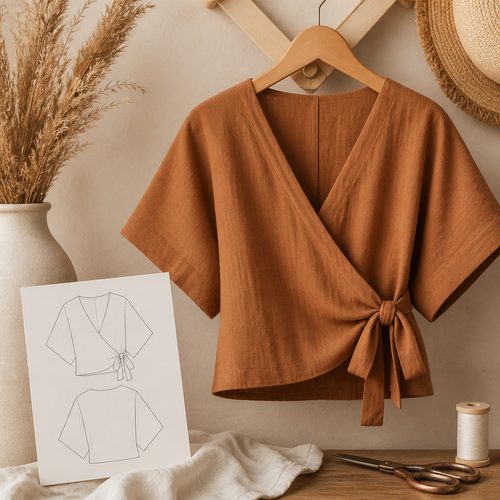
Boho Wrap Top Pattern, $4.99. Instant download, A4 and US Letter.
See the pattern
How do I sew an asymmetrical wrap top at home as a beginner?
What Is an Asymmetrical Wrap Top (and Why It's Perfect for Beginners)?
An asymmetrical wrap top, sometimes called an overlap blouse, is a pullover-style garment where one front panel extends past center front and overlaps the other, creating a diagonal or angled hemline rather than a straight one. Unlike a traditional wrap dress that ties at the waist, an asymmetrical wrap blouse is typically sewn as a closed garment — no ties required — which makes it significantly easier to fit and construct. The overlapping front panel gives the illusion of a wrap without any complicated closures, buttons, or buttonholes. This makes it an excellent first garment project for sewists who want something that looks impressive but doesn't demand advanced skills like zipper insertion or intricate seaming. The silhouette is also naturally forgiving of minor fit adjustments, because the drape of the overlapping layer disguises small discrepancies in seam allowances or hem evenness.
Choosing the Right Fabric: Why Linen Is the Best Choice
Linen is widely regarded as the ideal fabric for a wrap-style blouse because its natural drape allows the overlapping panel to lie flat and flow gracefully rather than bunching or stiffening. Medium-weight linen (around 4–5 oz per square yard) gives enough body to hold the asymmetrical hemline's shape while remaining breathable for warm-weather wear — exactly the quality that makes this style so popular as a summer sewing project. If you're new to sewing with linen, pre-wash your fabric at least twice before cutting to account for shrinkage, which can be significant (sometimes 5–8% in length). For a more casual, lived-in aesthetic, a linen-cotton blend softens further with each wash and is slightly more forgiving to cut and sew than 100% linen. Avoid stiff interfacing-weight linens or heavyweight canvas-weight linens, as these will cause the overlap panel to stand away from the body rather than draping smoothly.
Reading the PDF Pattern: Printing, Taping, and Sizing
A PDF sewing pattern downloads as a multi-page file that you print at home and tape together into full-size pattern pieces — no scaling required as long as you print at 100% (no 'fit to page' or 'shrink to printable area'). Most PDF patterns include a 1-inch or 1-centimeter test square on the first page; always print that page first and measure it with a ruler before printing the rest of the pattern to confirm your printer isn't rescaling the file. Once printed, cut along the exterior solid lines of each pattern piece, then lay them out on your fabric according to the included cutting layout diagram, which shows which pieces should be placed on the fold and which are cut as pairs. For an asymmetrical overlap blouse, you will typically have a back bodice, a main front panel, and a secondary overlap front panel — three core pieces that come together quickly. Grain line arrows on each piece must run parallel to your fabric's selvage edge; misaligning the grain even slightly on a drapey fabric like linen will cause the finished garment to twist or pull off-center.
Step-by-Step Construction: Sewing the Overlap Blouse
Begin by sewing shoulder seams, joining the front panels to the back bodice at the shoulders with right sides together, then pressing those seams open with an iron for a clean, flat result. Next, finish all raw edges along the neckline and the diagonal overlap hem using your preferred method — a narrow double-fold hem, a serged and topstitched edge, or even bias tape binding for a more polished look. Sew the side seams next, matching the underarm points carefully so the front and back align at the sides; on an asymmetrical design, the two front side seams will be different lengths, which is intentional. Attach sleeves if your pattern includes them (many minimalist wrap tops are sleeveless or have short flutter sleeves), easing any excess sleeve cap fullness evenly around the armscye before sewing. Finish by hemming the bottom of the back panel and the long asymmetrical hem of the overlap front panel separately, pressing everything well — a good final press on linen can make a home-sewn garment look professionally finished.
Fit Adjustments for Different Body Types
The overlapping front panel of a wrap blouse can be lengthened or shortened independently of the back bodice hem, which makes it easy to customize the degree of asymmetry to suit your preference or proportions. For a longer torso, add length at the 'lengthen/shorten' line printed on the bodice pattern piece rather than at the hem, so the armhole and shoulder proportions remain correct. Petite sewists can shorten both the back and overlap front hems by equal amounts, but should also consider reducing the sleeve length and neckline depth if applicable to keep the proportions balanced. If you find the overlap front panel gaps at the chest, try adding a small snap or hook-and-eye closure hidden behind the overlap; this is a common real-world modification that doesn't affect the external appearance of the garment at all. Fuller-busted sewists may also want to add a small bust dart to the main front panel or choose a size up in the bodice and take in the side seams, as many minimalist wrap patterns are drafted for a B-cup ease.
Where to Download the Pattern and What's Included
The Craftuary Asymmetrical Overlap Blouse PDF pattern is available as an instant digital download from the Craftuary shop at shopcedarcompass.com, priced at $11.25 — a strong value compared to similar patterns in the marketplace, which typically range from $9 to $18 depending on the level of instruction detail included. After purchase, you receive an immediate download link; no physical items are shipped. The pattern file includes all sized pattern pieces ready to print on standard US letter or A4 paper, a step-by-step illustrated instruction booklet, a fabric requirements chart by size, and a seam allowance guide. Because it's a digital file, you can print it as many times as needed — useful if you want to make the blouse in multiple sizes or share with a sewing group. The design is drafted for woven fabrics only and is not suitable for knit or stretch fabrics without significant pattern adjustments.
Key Takeaways
- An asymmetrical wrap top is sewn as a closed garment with no ties or closures, making it beginner-friendly and easy to fit.
- Medium-weight linen (4–5 oz) is the ideal fabric for this style — always pre-wash twice to account for shrinkage before cutting.
- Print PDF patterns at exactly 100% scale and verify the test square with a ruler before cutting all pages.
- Press seams open at every stage; a final full press on linen dramatically improves the professional appearance of the finished garment.
- The overlap panel length can be adjusted independently of the back hem, making it easy to customize asymmetry for different heights and proportions.
- The Craftuary pattern includes illustrated instructions, multi-size pieces, and fabric requirements — available as an instant download for $11.25.