How to Sew Baby & Toddler Shoes at Home: A Complete Guide to Using a PDF Sewing Pattern

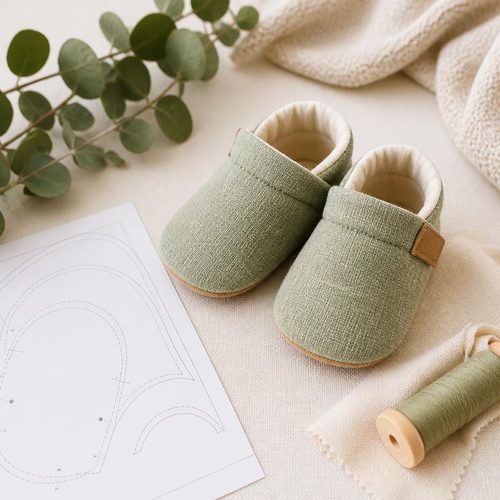
Baby Slipper Shoes Pattern, $4.99. Instant download, A4 and US Letter.
See the pattern
How do I sew baby shoes at home using a PDF sewing pattern?
What You Actually Get With a Baby Shoes PDF Sewing Pattern
A PDF sewing pattern for baby and toddler shoes is a digital file you download instantly after purchase — no waiting for shipping, no lost envelopes. The file typically contains printable pattern pieces scaled to multiple sizes (newborn through toddler, roughly US sizes 0–5 or EU sizes 16–22), along with step-by-step illustrated instructions. You print the pages at home on standard letter or A4 paper, tape the pieces together where indicated, and cut them out just like a physical pattern. Craftuary's baby shoes pattern includes all sizes nested on the same sheets, so you only print once and simply trace the size you need. This format is ideal for parents, grandparents, and gift-makers who want professional-looking results without professional pattern prices.
Materials You Need Before You Start Cutting
The most beginner-friendly baby shoe constructions call for quilting cotton, fleece, felt, or lightweight canvas for the outer shell, and a coordinating fabric or thin foam interfacing for the lining. You will also need a small piece of non-slip material or thin leather for the sole — this is the single most important safety detail for shoes worn by cruising toddlers, since a slippery sole on hardwood floors is a genuine fall hazard. Gather mid-weight fusible interfacing to stabilize the upper panels, plus an 8–12 inch length of elastic or a short strip of hook-and-loop tape for closure. A leather needle or a denim needle (size 90/14) handles the thicker sole layers far better than a universal needle and prevents skipped stitches. Having all of this pulled and pressed before you sit down at the machine means a pair of newborn slippers can be finished in under 45 minutes.
Step-by-Step: Cutting and Assembling the Upper
Print the pattern at 100% scale (do not select 'fit to page') and verify the 1-inch test square printed correctly before cutting any fabric. Trace each pattern piece onto your outer fabric, lining, and interfacing, adding the seam allowance indicated in the instructions — most baby shoe patterns use a 1/4 inch seam, which is narrow but consistent. Fuse the interfacing to the wrong side of your outer fabric pieces first, then stitch the side seams of the upper together with right sides facing, pressing each seam open as you go to reduce bulk around the toe box. Once the upper is assembled, clip the curves around the toe and heel at 1/4 inch intervals so the fabric eases smoothly rather than puckering when turned. Insert the lining inside the outer upper with wrong sides together, baste the bottom edge, and you have a clean, finished upper ready to attach to the sole.
Attaching the Sole Without a Professional Sole Press
The sole is the part that intimidates most beginners, but it is entirely achievable on a home sewing machine if you work slowly and use your hands to ease the fabric. Pin the assembled upper to the sole piece at the toe center, heel center, and both side points first — these four anchor pins distribute the ease evenly before you fill in the gaps. Stitch with the sole facing up so you can see your seam line, and use a walking foot or engage your machine's even-feed feature to prevent the layers from shifting. After stitching all the way around, trim the seam allowance to about 1/8 inch and clip notches every half inch so the sole curves lie flat. If you want a truly finished edge, a second pass of topstitching 1/8 inch from the edge both reinforces the seam and gives the shoe a clean, store-bought appearance that photographs beautifully for gifting.
Sizing Guide: Newborn Through Toddler
Baby foot sizes change rapidly in the first two years, so a multi-size pattern is far more economical than buying separate patterns for each growth stage. As a general guide, newborn (0–3 months) corresponds to an inner sole length of about 3.5 inches, while a size for a 12-month-old typically measures around 4.5 inches. Toddler sizes (18–24 months) run approximately 5 to 5.5 inches in inner sole length. The most reliable way to size is to trace the child's foot on paper, add 1/4 inch for wiggle room, and compare that tracing to the printed pattern pieces before cutting any fabric. Keep in mind that slipper-style shoes without a rigid sole are intentionally made slightly roomy to allow for sock thickness and natural toe splay, so sizing up one step from your measurement is rarely wrong.
Common Mistakes and How to Avoid Them
The most frequent error in home baby shoe making is printing the pattern at the wrong scale — always print at actual size, not 'shrink to fit,' and measure the test square before cutting a single piece of fabric. Skipping interfacing on the upper panels produces a floppy, shapeless toe box that collapses on the foot, so even a lightweight fusible makes a meaningful structural difference. Beginners often use thread that is too thick for the fine seam allowances; standard 50-weight cotton or polyester thread is ideal, and a smaller needle (size 70/10) on the decorative topstitching keeps the stitches from looking chunky on tiny pieces. Finally, resist the urge to rush the clipping step on curves — a few extra snips at the toe and heel seam allowances are the single biggest factor between a lumpy prototype and a smooth, professional-looking finished shoe. If a seam puckers after turning, simply open the seam, clip more generously, and re-press with a hot iron and a damp cloth.
Why a PDF Pattern Is the Smartest Buy for Baby Shoes
Unlike a physical pattern that wears out after a few tracings, a PDF sewing pattern can be re-downloaded, reprinted, and shared across an entire crafting lifetime. Craftuary's baby shoes pattern is priced to reflect this permanent-access value — you pay once and make shoes in every size from newborn through toddler as children grow, gifts accumulate, and fabric stashes demand to be used. The instant-download format means you can buy the pattern at 10 PM and start cutting fabric by 10:05, which is particularly useful when a baby shower is three days away. PDF patterns also allow you to print multiple copies and cut directly into the paper rather than tracing, preserving the original for future reference. For crafters who sell at markets or at shopcedarcompass.com themselves, a multi-size PDF pattern is a foundational investment that pays back dozens of times over in finished product.
Key Takeaways
- Always verify your PDF printed at 100% scale by measuring the included test square before cutting fabric.
- Use non-slip material for the sole of any shoe intended for a toddler who is walking or cruising.
- A multi-size PDF pattern covers newborn through toddler and can be reprinted indefinitely — far better value than a single-size physical pattern.
- Clip seam allowances at 1/4-inch intervals on all curves to prevent puckering at the toe and heel.
- Fuse interfacing to the outer upper pieces before sewing to give the shoe structure and a professional silhouette.
- Measure the child's actual foot and add 1/4 inch rather than relying on age-based sizing charts alone.
- A PDF sewing pattern downloads instantly, making it the best option for last-minute baby shower gifts.