How to Use a PDF Bag Sewing Pattern: A Complete Step-by-Step Guide for Home Sewists

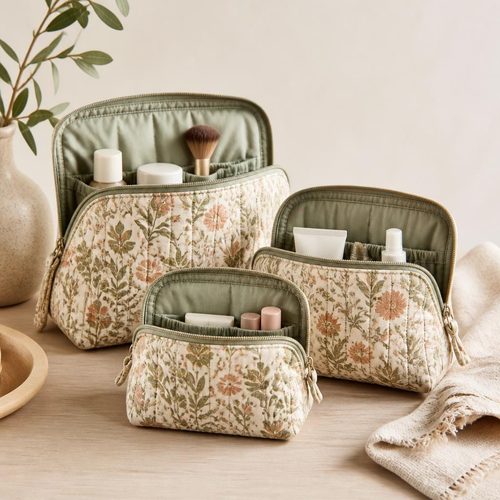
Open Up Pouch Sewing Pattern, $4.99. Instant download, A4 and US Letter.
See the pattern
How do you use a PDF bag sewing pattern to sew a bag at home?
What Is a PDF Bag Sewing Pattern?
A PDF bag sewing pattern is a digital file — typically a multi-page document — that contains all the templates, measurements, cutting guides, and assembly instructions you need to sew a finished bag at home. Unlike vintage paper patterns that can tear, fade, or go out of print, a PDF pattern is yours the moment you purchase and download it, and you can print it as many times as you need. Most PDF patterns are designed to be printed on standard 8.5" x 11" (US letter) or A4 paper, then assembled like a puzzle before cutting. Craftuary's bag sewing patterns, for example, include clearly labeled pattern pieces with grain lines, seam allowances, and step-by-step photo instructions so nothing is left to guesswork. This format has made PDF patterns the dominant choice for modern sewists because they're immediately accessible, infinitely reproducible, and often more detailed than mass-market alternatives.
What You'll Need Before You Start
Before you open your PDF pattern file, gather your materials so the project flows without interruption. You'll need a printer (home inkjet or laser printers both work), tape or a glue stick for assembling printed pages, fabric scissors or a rotary cutter with a self-healing mat, and an iron with a pressing surface. For most structured bags — totes, crossbodies, and gusseted styles — you should also have interfacing on hand, which stabilizes the fabric and gives the bag its shape; the pattern instructions will specify the weight (light, medium, or heavy fusible). A sewing machine with a standard presser foot, zipper foot, and a supply of universal needles (size 80/12 or 90/14 for medium-weight canvas or cotton) will cover the vast majority of bag styles. Finally, hardware like D-rings, swivel clips, magnetic snaps, and bag feet are worth sourcing before you begin rather than mid-project, since they're installed at specific construction stages and cannot easily be added later.
How to Print and Assemble Your PDF Pattern Pieces
Open your downloaded PDF in Adobe Acrobat Reader or a similar full-featured PDF viewer — do not use a browser's built-in PDF viewer, as it often rescales pages without warning. Before printing the full pattern, locate the test square (usually a 1-inch or 2-inch box printed on the first page) and print just that page at 100% scale, or "Actual Size" — never "Fit to Page." Measure the printed square with a ruler; if it matches the stated size, your scaling is correct and you can print the rest. Once all pages are printed, trim the margins on two sides of each page (typically the right edge and the bottom edge) following the crop marks, then lay them out on a flat floor in the numbered grid shown in the assembly diagram. Tape or glue the pages together, matching registration marks or overlapping lines precisely, to create full-size pattern pieces you can then cut out and pin to your fabric.
How to Cut Your Fabric Accurately
Accurate cutting is arguably more important than accurate sewing, because a crooked cut cannot be corrected later without losing seam allowance. Press your fabric with a hot iron before cutting to remove all wrinkles, which can shift measurements by a quarter inch or more on larger pieces. Lay your assembled pattern pieces on the fabric following the grain line arrows — these should run parallel to the fabric's selvage edge to ensure the bag hangs and wears correctly. Pin each piece securely, or use pattern weights if you prefer to avoid pin holes in delicate fabrics. When using a rotary cutter, cut with smooth, continuous strokes rather than short, choppy ones, and change your blade regularly since a dull blade drags and distorts fabric edges. Cut all pieces for a single bag in one session so the fabric is consistent — washing or environmental humidity between sessions can cause slight shrinkage that creates mismatched pieces.
Step-by-Step Bag Construction: The Core Assembly Order
Most bag sewing patterns follow a logical inside-out construction sequence: interior pockets and lining details first, exterior embellishments and structure second, then joining exterior to lining and turning right-side out. Start by fusing your interfacing to the wrong side of each exterior piece using a dry iron or steam, following the interfacing manufacturer's bonding instructions — inadequate heat is the most common reason interfacing peels away later. Sew interior patch pockets or zipper pockets to the lining fabric before any pieces are joined, since you'll never have cleaner access to these surfaces. Once your exterior panels are assembled and your lining is assembled separately, sandwich them right-sides-together, sew around the top opening, leave a turning gap, and pull the bag right-side out through the gap. Edgestitch the top opening closed, topstitch as directed, and then install any remaining hardware like bag feet or a magnetic snap through the bottom panel before closing any final seams.
Adding Handles, Straps, and Bag Hardware
Handles and straps are structural elements that bear load, so every attachment point must be reinforced — most patterns include a small square of extra interfacing or a bar-tack stitching pattern (a box with an X through it) to distribute stress across multiple thread passes rather than a single line of stitching. For sewn fabric straps, press the strip in half, open it, fold both long edges to the center crease, fold again, and edgestitch both sides; this creates a strap that is four layers thick at the stress point. Adjustable webbing straps require a slider and two D-rings or swivel hooks; always backstitch or bar-tack webbing attachment points three to four times rather than relying on a single seam. Magnetic snaps should be installed before the relevant panel is assembled into the bag — they require reinforcement on the fabric's wrong side (a small square of leather, thick interfacing, or a metal washer) to prevent tearing under repeated use. For metal bag feet, punch small holes with an awl and insert the prongs from the outside, then bend them flat against a piece of tape or leather on the inside of the bag's bottom panel.
Common Mistakes to Avoid When Following a Bag Pattern
The most frequent error new sewists make is skipping the test print calibration step, resulting in pattern pieces that are 5–15% too small or too large — a bag that should hold a laptop ends up the size of a clutch. A close second is under-interfacing: if the finished bag feels floppy, the solution is almost always heavier or additional interfacing layers, not a construction flaw. Many sewists also overlook clipping curves and notching inward curves before turning — without this step, the seam allowance bunches and the finished bag shows puckering along curved edges like flap openings or rounded base corners. When sewing over thick seam intersections (especially at strap attachment points with webbing), slow your machine speed to manual, hand-turning the wheel if necessary, to avoid breaking needles and skipped stitches. Finally, pressing every seam open or to one side as you go — not just at the end — is the single habit that most clearly separates professional-looking finished bags from amateur ones.
Why a Quality PDF Bag Pattern Is Worth the Investment
A well-designed PDF bag sewing pattern — like those available from Craftuary — is a one-time purchase you can reuse across multiple fabric choices, sizes, and colorways for years. The cost of a premium digital bag pattern, typically in the $7–$12 range, is a fraction of what a finished handmade bag would retail for, yet it gives you full creative control over fabric, hardware, color, and customization. Because PDF patterns are digital, they're available instantly after purchase without waiting for shipping, and you'll never lose them if you store the file in cloud backup. Detailed photo-tutorial patterns also function as a skill-building resource — each new bag project teaches interfacing techniques, zipper installation, and hardware application that transfer to every future sewing project. For anyone who sews more than two or three bags a year, having a library of reliable, tested digital patterns is one of the highest-return investments a home sewist can make.
Key Takeaways
- Always print your PDF pattern at 100% Actual Size and verify the test square before printing all pages.
- Fuse interfacing to all exterior pieces before assembly to give your bag structure and durability.
- Follow the interior-first construction sequence: pockets and lining details before joining exterior to lining.
- Reinforce every strap and handle attachment point with bar-tack stitching or a box-X stitch pattern.
- Press every seam as you sew — consistent pressing is the single biggest factor in a professional-looking finished bag.
- PDF bag patterns are reusable for multiple projects and available as instant downloads, making them a high-value investment for home sewists.