How to Sew an Oversized Square Neck Tank Top with Wide Straps (Beginner-Friendly Tutorial)

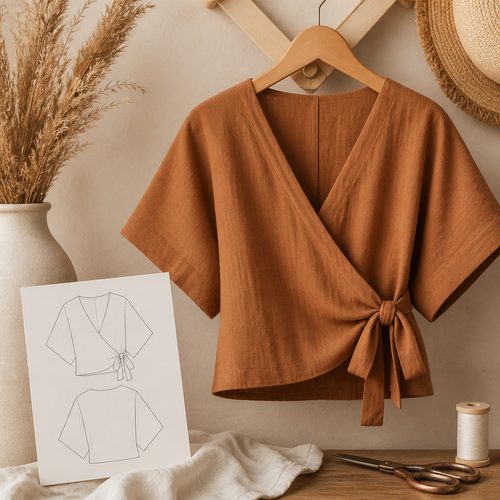
Boho Wrap Top Pattern, $4.99. Instant download, A4 and US Letter.
See the pattern
How do I sew an oversized square neck crop top with wide straps?
What Is an Oversized Square Neck Tank Top and Why It's Worth Making
An oversized square neck tank top is a relaxed-fit, cropped or hip-length top defined by its wide, flat neckline and broad shoulder straps — typically 1.5 to 3 inches wide. Unlike traditional spaghetti-strap tanks, the wide straps provide more coverage and lay flat without twisting, making this style both comfortable and polished enough for everyday wear. The boxy silhouette means minimal shaping is required, so there are very few curved seams to wrestle with, which is exactly why this pattern is such a popular first garment project for beginner sewists. The square neckline also photographs beautifully, which has made this style a staple of handmade fashion content on Pinterest and Instagram. If you want a high-reward garment that comes together in an afternoon, this is one of the best patterns to have in your digital library.
Fabrics That Work Best for This Pattern
The best fabrics for an oversized square neck tank are those with a soft drape and minimal stretch — linen, cotton lawn, rayon challis, and cotton-linen blends all perform exceptionally well. Woven fabrics are ideal because the straight neckline and strap edges stay crisp and flat without requiring stabilizers or interfacing. Linen in particular is a perennial favorite for this style: it breathes beautifully in warm weather, softens with every wash, and gives the top a relaxed, elevated aesthetic that works for both casual outings and dressier occasions. If you want a little more body, a mid-weight cotton such as quilting cotton or a cotton poplin will give the top a slightly more structured look. Avoid fabrics with a lot of stretch, like jersey knit, unless the pattern is specifically drafted for knits — the square neckline will distort and gap if the fabric has too much horizontal give.
Tools and Supplies You'll Need Before You Start
Before you cut a single piece of fabric, gather your tools so the process stays smooth. You'll need a sewing machine (a basic mechanical model works perfectly), sharp fabric scissors or a rotary cutter with a self-healing mat, pins or fabric clips, an iron and ironing board, a seam ripper for any corrections, and a fabric marking tool like tailor's chalk or an air-erasable pen. For hardware, have matching thread, a hand-sewing needle for finishing, and optional seam tape or fusible hem tape if you prefer a no-fuss hem. A clear quilting ruler is especially handy for marking the square neckline accurately — even a small deviation from a true right angle will show in the finished garment. If you're printing a PDF pattern at home, you'll also need a printer, tape, and scissors to assemble the tiled pages before cutting.
How to Print and Assemble Your PDF Sewing Pattern
Download your PDF pattern file and open it in Adobe Acrobat Reader or a similar PDF viewer — do not use your browser's built-in PDF viewer, as it may scale the pages incorrectly. Before printing the full pattern, print the test square page (usually labeled 'calibration square' or '1-inch test box') and measure it with a ruler; it should measure exactly as labeled. If it doesn't, adjust your printer's scale percentage until it matches. Print the remaining pages at 100% with no page scaling and no 'fit to page' selected. Trim the white border from three sides of each page — typically the right and bottom edges — and tape the pages together following the numbered assembly diagram included in the PDF. Once assembled, you'll have full-size pattern pieces ready to trace or cut directly.
How to Cut Your Fabric Pieces Accurately
Prewash and press your fabric before cutting — this step is non-negotiable, because most natural fibers like linen and cotton will shrink on first wash, and you don't want your finished top to come out smaller than expected. Fold your fabric in half selvedge to selvedge and lay it on a flat, hard surface. Place your pattern pieces on the fabric according to the grain line arrows printed on each piece, making sure the grain line runs parallel to the selvedge edge of your fabric. Pin or weigh the pieces down with pattern weights, then cut around them with smooth, long strokes of your scissors — short choppy cuts create jagged edges. Transfer all notches and markings to the fabric using tailor's chalk or snip marks before removing the pattern pieces.
Sewing the Square Neckline: The Most Important Step
The square neckline is the most visually prominent feature of this top, so it's worth taking extra care here. To sew a clean square neckline facing, cut a facing piece from the same fabric in the shape of the neckline opening, then sew it to the top with right sides together, pivoting your machine's needle precisely at each inside corner — leave the needle down, lift the presser foot, pivot 90 degrees, and continue. Clip small notches into the curved allowances and cut diagonally across each corner seam allowance very close to the stitching (without cutting through it) so the corners lie flat when turned right side out. Press the facing to the inside of the top with a hot iron, understitch the facing to the seam allowance to prevent it from rolling to the outside, then hand-tack or topstitch the facing in place. This method gives you a sharp, professional-looking neckline that holds its shape through washing.
Attaching the Wide Straps and Sewing Side Seams
Cut your strap pieces according to the pattern measurements — wide straps are typically cut as rectangles, folded in half lengthwise, and stitched along the long raw edge to form a tube. Turn the strap tubes right side out (a loop turner or safety pin threaded through makes this much easier) and press them flat so the seam runs down the center back of each strap. Pin the straps to the front bodice at the marked positions before attaching the back, matching notches carefully, and baste them in place. Next, pin the front and back bodice pieces right sides together at the side seams and stitch with your chosen seam allowance — a French seam or serged edge will give the interior a neat finish that holds up to repeated washing. Press the side seams open or toward the back depending on the pattern instructions.
Hemming and Finishing Your Top
For the bottom hem, the most common finish on this style is a simple double-fold hem: fold the raw edge up by ¼ inch, press, fold up again by another ½ inch, press again, then topstitch close to the inner folded edge. This creates a clean, flat hem that works beautifully on lightweight woven fabrics. If you want an even more polished look, use fusible hem tape inside the fold and press with steam for a hem that needs no topstitching at all. Give the entire finished top a final press on a medium-heat setting — use a pressing cloth if your fabric is delicate — paying special attention to the neckline corners and strap attachment points. Try the top on and check the strap length before doing any final finishing; it's much easier to adjust the straps now than after all the raw edges are enclosed.
Beginner Tips for Getting a Great Fit
The oversized silhouette of this top means standard sizing translates well for most bodies, but a few adjustments can make a significant difference. If you're between sizes, cut the larger size and take in the side seams gradually during a fitting — it's always easier to remove fabric than to add it. For a longer crop or a hip-skimming length, simply add inches to the bottom of the pattern piece before cutting, keeping the side seam lines straight. If the square neckline gaps at the center front, the straps may need to be shortened slightly or repositioned closer to the neckline edge. Sewing a quick muslin (a test version in inexpensive fabric) before cutting into your good linen or cotton is worth the extra hour if you're new to fitting, but many beginners skip this step entirely on boxy patterns like this one and still achieve great results.
Where to Get the PDF Pattern
The Craftuary oversized square neck tank top sewing pattern is available as an instant PDF download from the Craftuary shop at shopcedarcompass.com. The pattern includes multiple sizes, a clear assembly diagram for printing, full illustrated step-by-step sewing instructions, and a fabric requirements chart — everything a beginner needs to complete the project confidently. Because it's a digital download, you receive the file immediately after purchase with no shipping wait, and you can print as many copies as you need for personal use. The pattern is priced accessibly at under $7, making it one of the most cost-effective ways to add a versatile summer wardrobe staple to your handmade closet. Simply download, print, and sew — most sewists finish this top in a single afternoon session.
Key Takeaways
- An oversized square neck tank top uses a boxy silhouette with a flat, wide neckline and broad straps — ideal for beginner sewists because it involves minimal curved seams.
- Woven fabrics like linen, cotton lawn, and rayon challis are the best choices; avoid stretch fabrics unless the pattern is drafted for knits.
- Printing PDF patterns correctly requires setting your printer to 100% scale with no 'fit to page' — always verify with the calibration square before printing the full file.
- The inside corners of the square neckline require clipping and diagonal trimming of corner seam allowances to achieve sharp, professional-looking corners.
- Prewashing your fabric before cutting prevents post-sewing shrinkage and ensures the finished garment retains its intended size and shape.
- The Craftuary PDF pattern is an instant download available at shopcedarcompass.com for under $7, including multi-size pieces and full illustrated instructions.