How to Crochet a Montessori Stacking Toy: A Complete Guide to Amigurumi Stackable Rings for Babies

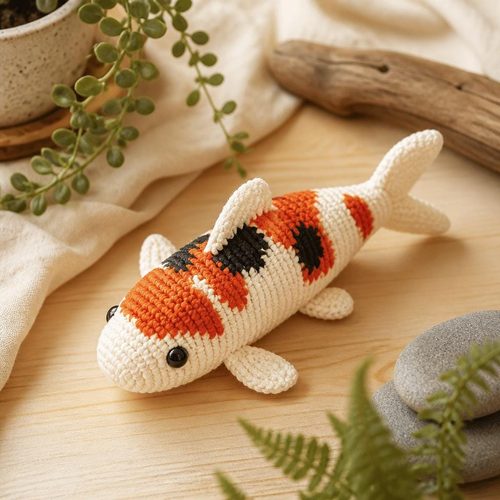
Koi Fish Amigurumi, $4.99. Instant download, A4 and US Letter.
See the pattern
How do I crochet a Montessori stacking toy for a baby?
What Is a Montessori Crochet Stacking Toy — and Why Make One?
A Montessori stacking toy is a classic open-ended learning material made up of rings in graduated sizes that a child fits onto a central post, developing hand-eye coordination, size sequencing, and fine motor skills. When crocheted from soft yarn, the toy becomes safer and quieter than its wooden or plastic counterparts — ideal for infants as young as six months who are still mouthing everything they touch. Amigurumi-style construction (working in continuous rounds with a tight gauge) gives each ring a firm yet squishy feel that babies find satisfying to grip and release. Because every piece is fabric, there are no sharp edges, no paint, and no splinters, making it one of the most gift-appropriate baby items a crafter can produce. A handmade version also lets you customize colors to match a nursery palette or celebrate a new baby with personalized hues — something no mass-market toy can offer.
Materials You'll Need to Get Started
For a standard set of five to seven stacking rings plus a base, you will need approximately 200–350 yards of worsted-weight (size 4) cotton or cotton-blend yarn, split across as many colors as you want rings. Cotton is the preferred fiber for baby toys because it is washable, hypoallergenic, and holds its shape well under tight amigurumi tension. You will also need a 3.5 mm or 4.0 mm crochet hook (go smaller than the yarn label recommends to close up gaps and keep stuffing inside), polyester fiberfill stuffing rated safe for children's toys, stitch markers, a yarn needle for weaving ends, and a pair of scissors. Optionally, safety eyes are used decoratively on some versions, but for babies under three years old it is best practice to embroider any facial features or leave the rings plain to eliminate choking hazards entirely. Having a printed or digital copy of your pattern on hand before you sit down saves the frustration of stopping mid-round to look up stitch counts.
Understanding the Pattern Structure: Rings, Post, and Base
A well-written Montessori crochet stacking toy pattern is divided into three distinct component groups: the base (a weighted, flat disc or cylinder that holds the post upright), the post (a long, narrow tube crocheted tightly and stuffed firmly so it stands vertical), and the rings themselves (worked as toroids — essentially crocheted donuts — in graduated outer diameters). The rings are typically labeled from largest to smallest, often with stitch counts like 60-48-36-24-12 for the outer circumference of each, so the pattern reads almost like a size chart. Most digital patterns use US crochet terminology, so if you learned in UK notation, remember that a US single crochet equals a UK double crochet. Magic ring (also called magic circle) starts are standard for nearly every component, so practicing that technique before diving in will save time. Increases and decreases in the ring sections follow the same logic as any amigurumi sphere — you are just stopping partway through the shaping to create an opening rather than a closed ball.
Step-by-Step: Crocheting the Post and Base
Begin with the base by working a magic ring, completing six single crochets into the ring, then pulling it closed — this is your starting circle. Increase every round (two single crochets into each stitch, then alternating, following standard amigurumi disc progression) until the base disc reaches roughly 3.5 to 4 inches in diameter; this gives enough footprint to keep the toy from tipping when a baby pulls a ring off enthusiastically. Stuff the base firmly before closing it — some makers add a small amount of clean polyfill weighted with a disk of plastic canvas on the interior bottom to improve stability. For the post, crochet a tight tube of approximately 8 to 10 single crochets in the round, continuing for 25 to 35 rounds depending on how many rings your set includes (you want at least half an inch of clearance above the top ring). Stuff the post very firmly as you go, then attach it securely to the center of the base with several rounds of slip stitches and weave the tail through multiple layers so it cannot pull free under play pressure.
Crocheting the Rings in Graduated Sizes
Each ring is worked as a tube that is then joined at both ends to form a torus shape — think of it as crocheting a short bracelet and seaming it into a circle. Start each ring with a chain foundation sized to the target outer circumference, join to work in the round, and single crochet for four to six rows to give the ring enough height to stack visibly and grip easily. Before closing the tube into a ring shape, stuff it lightly — just enough to give it a plump, rounded cross-section without making it so rigid that it won't slide smoothly onto the post. Graduated sizing is achieved simply by changing the length of your foundation chain: the largest ring might start with a chain of 48, the next with 40, down to a smallest ring with a chain of 16 or so, always checking that the finished inner opening is wide enough to slip onto your post with room to spare. Working through the back loop only on alternating rows gives the rings a subtly ribbed texture that makes them easier for small hands to grasp, and it uses no extra steps or materials.
Safety Finishing and Quality Checks Before Gifting
Before giving any crocheted baby toy as a gift, perform a seam-tug test on every joined piece: grip both sides of each attachment point and pull firmly in opposite directions, simulating what a determined infant will do. If any seam gives way or stretches more than a few millimeters, reinforce it with additional whip stitches using a doubled strand of yarn. Check that no stuffing is accessible through gaps in the crochet fabric — a gauge tighter than recommended on the yarn label is your first defense, but a final visual inspection under good light catches anything you missed. All yarn tails should be woven in at least one full inch in multiple directions and then trimmed flush; loose ends are both a choking hazard and an unraveling risk. Wash the finished toy in a mesh laundry bag on a gentle cycle and tumble dry on low before gifting so the recipient family knows the toy is machine-washable going forward — this is one of the biggest selling points of a crocheted toy over a wooden one.
Why Buy a Digital Pattern Instead of Making Your Own?
Drafting an original amigurumi pattern from scratch requires understanding gauge math, size ratios, and structural engineering of stuffed forms — skills that take years of trial and error to develop reliably. A professionally written digital download pattern, like the one available from Craftuary, has already been tested across multiple yarn weights and hook sizes, with notes on how to adjust if your gauge is slightly off, saving you hours of frogging and restarting. Instant download means you have the pattern in your hands within minutes of purchase, so an impulse to start a project on a Sunday evening is not derailed by shipping delays. At the typical price point of under ten dollars, a quality pattern costs less than a single skein of the yarn you'll use, making it one of the highest-value purchases in a crafter's toolkit. The pattern also typically includes photos of each assembly stage and a finished-object photo you can reference throughout — a resource you simply cannot replicate when improvising.
Frequently Asked Questions About Crochet Montessori Stacking Toys
Can I sell finished toys made from a purchased pattern? Most independent designers, including Craftuary, allow small-batch handmade sales of finished objects with credit given to the designer — always check the specific license included with your download. What yarn is safest for baby toys? 100% cotton or OEKO-TEX certified cotton blends are the gold standard; avoid novelty yarns with loose loops or long fibers that could catch on small fingers. How long does the project take? An experienced crocheter can complete a five-ring set in four to six hours total; a newer crocheter should budget eight to twelve hours spread over several sessions. Is this pattern beginner-friendly? If you can single crochet in the round and work a magic ring, you have all the technical skills required — the pattern walks you through every increase and decrease explicitly. Can I make the rings larger or smaller for an older child? Yes — adding or subtracting stitches from the foundation chain scales each ring proportionally, and the pattern notes explain how to maintain the correct size gradient as you adjust.
Key Takeaways
- A Montessori crochet stacking toy is made from a base, a vertical post, and graduated toroidal rings — all constructed using standard amigurumi single-crochet-in-the-round techniques.
- Use worsted-weight cotton yarn with a hook one size smaller than recommended to close gaps and keep stuffing securely inside every component.
- Graduated ring sizes are achieved by adjusting the foundation chain length; inner opening diameter must always exceed the post's outer diameter for smooth stacking.
- Perform a firm seam-tug test and a wash cycle before gifting any crocheted baby toy to verify safety and colorfastness.
- A tested digital download pattern eliminates gauge guesswork, provides photo references for every assembly stage, and is available instantly for under $9.