How to Crochet a Baby Bunny in a Hoodie: Complete Amigurumi Pattern Guide (9-in-1 Bundle)

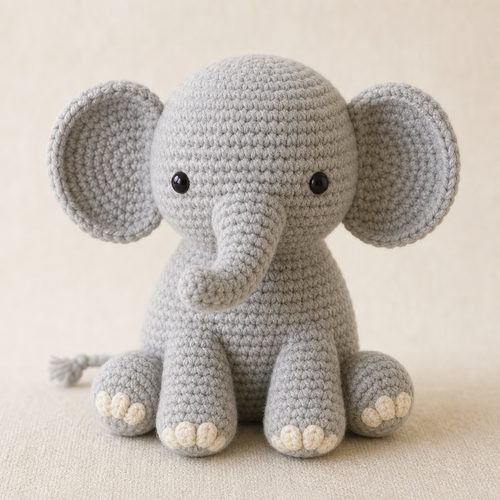
Baby Elephant Crochet Pattern, $4.99. Instant download, A4 and US Letter.
See the pattern
How do you crochet a baby bunny amigurumi wearing a hoodie?
What Is a Baby Bunny in Hoodie Crochet Pattern Bundle — and Why the 9-in-1 Format Matters
A baby bunny in hoodie crochet pattern bundle is a single downloadable PDF (or set of PDFs) that gives you multiple design variations — typically different hoodie colors, ear styles, facial expressions, or accessory options — all built on one core amigurumi bunny body pattern. The 9-in-1 format is particularly valuable because it means you purchase once and unlock nine distinct finished looks, which dramatically reduces the cost per design compared to buying individual character patterns. For crafters who sell at markets or stock an shop, this kind of bundle provides variety without requiring you to learn nine completely different construction methods. Each variation shares the same fundamental shaping logic, so once you complete your first bunny, subsequent versions come together much faster. Craftuary's digital download version of this bundle is available instantly at shopcedarcompass.com, meaning you can start swatching within minutes of purchase.
Skill Level and Materials You'll Need Before You Start
Baby bunny amigurumi in hoodies are best suited to confident beginners and intermediate crocheters — you should be comfortable with magic rings, single crochet increases and decreases, and working in continuous rounds before attempting this project. For yarn, a fingering-weight or DK-weight yarn in your chosen bunny color (typically a soft cream, grey, or brown) pairs beautifully with a contrasting sport or DK weight in the hoodie color; cotton-blend or acrylic yarns both work well because they hold their shape after stuffing. You'll need a 2.5 mm to 3.5 mm crochet hook depending on your yarn weight — check the tension swatch guidance in the pattern, because gauge directly affects the finished size of your bunny. Other supplies include polyester fiberfill stuffing, a yarn needle for seaming and weaving in ends, safety eyes (typically 6 mm to 9 mm for a palm-sized amigurumi), and stitch markers to track round beginnings. Optional but helpful: a small piece of cardboard or a pompom maker if the pattern includes a fluffy tail variation.
Understanding the Pattern Structure: How Amigurumi Rounds Work
Amigurumi patterns are written in continuous spiral rounds rather than joined rounds, which means you do not slip stitch and chain at the end of each row — instead you simply keep crocheting in a continuous spiral, using a stitch marker to track where each new round begins. The abbreviations you'll encounter most often are MR (magic ring), sc (single crochet), inc (increase — two single crochets in the same stitch), dec (invisible decrease — inserting your hook through the front loops of two consecutive stitches), and FO (fasten off). When the pattern says something like 'Rnd 5: [sc 3, inc] × 6 (30 sts),' it means you repeat the bracketed sequence six times, and you should count 30 stitches at the end of the round to confirm you're on track. Keeping a stitch count at the end of every round is the single most important habit for clean amigurumi — catching an error at round 5 is far easier than discovering a miscount at round 18 when the body is half-stuffed. Most bunny body patterns begin with a magic ring, expand outward through several increase rounds to form the base of the head or body, plateau through straight rounds, then taper back down with decrease rounds to close the piece.
Crocheting the Bunny Body and Head: Step-by-Step Logic
Most baby bunny amigurumi patterns separate the head and body into two pieces that are seamed together, though some patterns work the body in one continuous piece from bottom to top — your pattern instructions will specify which method applies. For a two-piece construction, begin with the head: work a magic ring, complete your increase rounds until you reach the widest diameter (commonly 30–36 stitches for a palm-sized bunny), work several straight rounds to form the cheek and forehead area, then place your safety eyes between specific rounds as indicated — typically between rounds 10 and 11, spaced 6–8 stitches apart for a forward-facing expression. Begin your decrease rounds, stuffing the head firmly with polyester fiberfill before the opening becomes too small to work comfortably. The body is worked similarly but with a slightly more elongated silhouette; many bunny patterns shape a subtle tummy curve by using a small number of increases along the front center before the decrease section begins. Fasten off both pieces leaving a long tail for seaming, then use a yarn needle and mattress stitch or whipstitch to join head to body, making sure the face is oriented correctly before you close the seam completely.
Crocheting the Hoodie: Construction and Color-Change Techniques
The hoodie element is what makes this design stand out from a standard bunny amigurumi, and it's typically constructed as a separate piece that is either crocheted directly onto the bunny's body or made as a removable garment depending on the pattern version. If the hoodie is worked directly onto the body, you'll join your contrasting yarn at a specific stitch around the neck area and crochet in joined rounds using slip stitches and chains to simulate a finished garment edge. The hood portion is usually a small rectangle or slight trapezoid crocheted flat, then folded and seamed to form the characteristic tunnel shape that frames the bunny's face — this is where the design gets its signature 'character in a cozy' look. Color changes within the hoodie, such as pocket details or stripe accents, are made by dropping the current color at the end of a stitch, pulling the new color through the final two loops of that stitch, then carrying the unused yarn along the inside of the work to avoid too many ends to weave in. A single crochet border worked in the main body color around the hoodie's opening neatens the edge and integrates the garment visually with the rest of the figure.
Ears, Face Embroidery, and Final Assembly Tips
Bunny ears are typically worked flat in two pieces each, often with an inner ear panel in a contrasting pink or cream color that is whipstitched to the main ear before both layers are seamed together and stuffed lightly or left flat depending on the style. Position the ears by pinning them to the top of the head before sewing — most patterns give a round number and stitch count for placement, but visual symmetry matters just as much as following the number exactly, so step back and assess the look before you commit to the seam. Facial features beyond the safety eyes — a small nose, a subtle smile, and sometimes blush circles for cheeks — are embroidered using a yarn needle and a contrasting color of yarn or embroidery floss; satin stitch fills the nose triangle while a simple curved backstitch creates the mouth. For the tail, a small pompom (wound around two fingers or a pompom maker) or a crocheted circle gathered into a puff is sewn to the back lower body. A final steam block — holding a steam iron several inches above the finished figure rather than pressing directly — relaxes any tight stitches and gives the finished bunny a smoother, more professional appearance.
Creative Uses: Gifts, Market Sales, and Customization Ideas
A completed baby bunny in hoodie amigurumi is one of the most versatile handmade gifts available: it works as a baby shower present, an Easter basket centerpiece, a nursery decor accent, or a collectible display piece for craft enthusiasts of any age. Because the 9-in-1 bundle gives you nine design variations, you can produce a small collection using different hoodie colors — pastel rainbow sets sell especially well at spring craft fairs and holiday markets — without needing to draft a single stitch of original pattern design yourself. Many crafters also personalize their bunnies by swapping the safety eyes for embroidered eyes to make the finished toy safe for children under three, changing the hoodie color to match a sports team or school mascot, or adding a name tag embroidered onto the pocket detail. If you plan to sell finished items made from this pattern, check the pattern's commercial use license — Craftuary's listings include license terms in the product description so you know exactly what's permitted before you take orders. Photographing your finished bunnies against a clean linen background or nestled in a small wicker basket consistently produces the kind of scroll-stopping imagery that drives saves and sales on handmade marketplaces.
Where to Get the Pattern and What the Download Includes
The 9 in 1 Baby Bunny in Hoodie Crochet Pattern Bundle is available as an instant digital download from Craftuary at shopcedarcompass.com, priced at $7.20 and accessible immediately after purchase with no shipping wait. The download typically includes a multi-page PDF with written round-by-round instructions for all nine variations, a materials and abbreviations reference page, and step-by-step assembly photos or diagrams to guide seaming and placement decisions. Because it's a digital file, you can print as many copies as you like, annotate your working copy, and store the original safely in cloud storage for future reference — no risk of a pattern book going out of print. If you ever have trouble with a downloaded file, Craftuary's shop policies include re-download support, so you're not left troubleshooting alone. Purchasing through the official listing at the link above ensures you receive the most current version of the pattern, including any corrections or updated photography the designer has released since the original publication.
Key Takeaways
- The 9-in-1 bundle gives you nine distinct baby bunny hoodie variations from one purchase, making it highly cost-effective for crafters who sell or gift finished amigurumi.
- Work amigurumi in continuous spiral rounds — not joined rounds — and count stitches at the end of every round to catch errors early.
- Safety eyes should be placed between specific rounds before the head is fully decreased and stuffed; check the pattern's exact placement instructions before closing the opening.
- The hoodie is typically crocheted as a separate piece joined at the neck, with the hood formed by a folded and seamed rectangle that frames the bunny's face.
- Steam blocking the finished figure — without pressing — smooths tight stitches and gives the amigurumi a more polished, market-ready appearance.
- Check the commercial use license included in the pattern PDF before selling finished bunnies made from this design.
- The instant digital download is available at shopcedarcompass.com for $7.20 with immediate access after purchase.