How to Crochet a Mesh Market Tote Bag: Complete Beginner's Guide (3 Sizes)

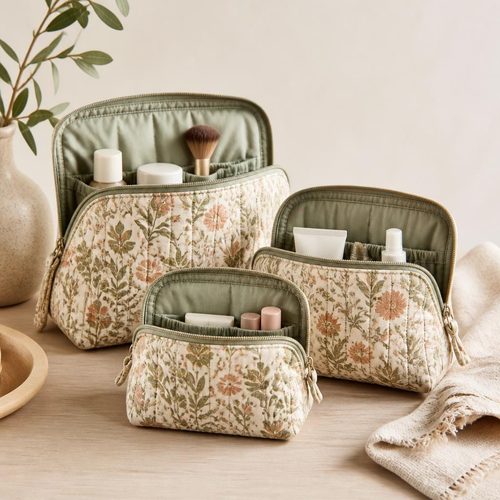
Open Up Pouch Sewing Pattern, $4.99. Instant download, A4 and US Letter.
See the pattern
How do I crochet a mesh market tote bag for beginners?
What Is a Mesh Market Tote and Why Every Crocheter Should Make One
A mesh market tote is a lightweight, open-weave bag crocheted using a repetitive chain-space or net stitch that creates a flexible grid of yarn with built-in stretch. Unlike solid-stitch bags, the open mesh structure allows the bag to expand significantly when loaded with groceries, produce, or farmers market finds, then collapse flat when empty. This makes mesh totes far more practical than traditional crocheted bags for everyday reusable shopping. They are also one of the most beginner-friendly bag constructions because the stitch repeat is simple and consistent — once you learn the two-row pattern, the entire bag works up almost automatically. Beyond practicality, a handmade mesh tote is a meaningful zero-waste swap: cotton or jute yarn is washable, durable, and fully compostable at end of life, making it a genuinely sustainable alternative to plastic or synthetic reusable bags.
Materials You Need Before You Start
For a beginner mesh market tote, you want a smooth, sturdy yarn in the worsted or DK weight range — 100% cotton is the gold standard because it holds its shape, washes well, and doesn't stretch out permanently under the weight of groceries. A single skein of 200–400 yards is typically enough for a medium-sized tote, though the exact yardage depends on your finished size. You will need a crochet hook sized to your yarn label's recommendation, usually a 4.0 mm to 5.5 mm hook for cotton worsted; going up half a hook size from the label suggestion creates a slightly more open mesh, which is desirable for this style. A tapestry needle for weaving in ends and a pair of scissors complete your supply list. Stitch markers are optional but helpful for tracking the beginning of each round if you crochet in the round rather than flat.
Understanding the Mesh Stitch: The Core Technique
The mesh stitch that defines a market tote is built on a simple alternating sequence: chain a set number, skip the same number of stitches or chains, then anchor with a single crochet or slip stitch. This creates the open diamond or square grid that gives the bag its stretchy, net-like appearance. Because the stitch is a two-row or two-round repeat, your hands quickly memorize the rhythm and the work moves very fast compared to denser stitches like half double or double crochet worked in every stitch. The key tension concept for beginners is to keep your chain loops loose and even — chains that are too tight will make the bag stiff and reduce its stretch capacity. Practice a small 10-round swatch before starting the bag proper to find your natural chain tension, then adjust your hook size if the swatch feels either too rigid or too floppy for a bag that needs to hold weight.
Choosing Your Size: Small, Medium, and Large Tote Dimensions
A three-size pattern gives you the flexibility to match the bag to its intended use rather than forcing one size to do every job. A small tote — roughly 10 to 12 inches wide and 10 inches deep — works perfectly as a produce bag, a library book tote, or a project bag for yarn. The medium size, approximately 14 to 16 inches wide and 14 inches deep, is the classic farmers market grocery bag that holds a typical shopping trip for one or two people. A large tote at 18 or more inches wide and 16 to 18 inches deep functions as a genuine grocery run bag, capable of holding several pounds of produce plus boxed goods without straining the handles. When working from a sized pattern, always start with the foundation chain count given for your chosen size and do not substitute a different chain count, as the mesh stitch repeat must divide evenly into the starting chain for the pattern to work correctly. Gauge swatching is especially important when sizing up to the large version, since a small tension difference that is invisible in a small bag becomes a two-inch discrepancy in a large one.
Step-by-Step Construction Overview: From Foundation Chain to Handles
Most mesh market tote patterns begin with a foundation chain that determines the bag's circumference, which you then join into a ring and crochet in continuous rounds upward — this avoids seams entirely and creates a cleaner finished bag. After reaching the desired body height, you typically work several rounds of denser stitch (like single crochet) at the top edge to stabilize the opening and prevent the mesh from stretching out where it sees the most stress. Handles are either crocheted separately as long chains reinforced with single crochet and then sewn on, or they are integrated directly into the top rounds by skipping a section of stitches and chaining across to form a natural loop. For maximum durability, working two or three rows of single crochet all around the handle loop distributes the load-bearing stress across many yarn strands rather than concentrating it at attachment points. The base of the bag is either a flat crocheted circle (worked in single or double crochet, then the body is crocheted around its perimeter) or a simple chain foundation that creates a flat bottom when the sides are crocheted upward and the bag is blocked.
Why a Video Tutorial Is a Game-Changer for Beginners
Written crochet patterns use standardized abbreviations and assume familiarity with how stitches look in progress, which creates a real comprehension gap for newer crafters who have not yet built a visual library of what each stitch looks like mid-construction. A video tutorial eliminates that gap by showing exactly where to insert the hook, how the yarn loops should sit, and what the mesh structure looks like after each round — information that a written pattern simply cannot convey as efficiently. For a mesh tote specifically, seeing the chain-space stitch worked in real time makes it immediately clear how loose or tight to keep the loops, which is the single most common source of beginner frustration with this pattern type. A video also shows how to troubleshoot common errors like twisted foundations, uneven mesh diamonds, or handles that pull unevenly — mistakes that are hard to diagnose from text alone. Patterns that include both a written PDF and a companion video tutorial are the best investment for a beginner because you can use the video to learn the motion and the PDF to track your round counts and size-specific stitch numbers simultaneously.
Finishing, Blocking, and Washing Your Completed Tote
Once your tote is crocheted, weaving in all yarn ends securely with a tapestry needle is critical for a bag that will be loaded with weight and washed repeatedly — leave at least a six-inch tail and weave the end through stitches in two different directions before trimming. Blocking a cotton mesh tote transforms it from a slightly bunched, uneven-looking fabric into a flat, evenly stretched finished object: simply wet the bag thoroughly, gently squeeze out excess water, and pin it to your desired dimensions on a foam mat or towel, then let it air dry completely. This step is especially important for the mesh stitch because the open structure benefits enormously from being stretched into shape while the cotton fibers are wet and pliable. For ongoing care, machine washing on a gentle cold cycle and air drying keeps cotton totes in excellent condition for years. Avoid high-heat dryer cycles, which cause cotton to shrink and can distort the mesh structure, particularly around the handles.
Get the Pattern: Mesh Market Tote PDF with Video Tutorial
The Mesh Market Tote pattern from Craftuary is available as an instant-download PDF that includes all three sizes — small, medium, and large — with complete written instructions, stitch counts for every round, and a materials list for each size. It is written specifically for beginners, with extra explanatory notes at the steps most likely to cause confusion, including the mesh stitch setup row, the handle construction, and the base join. The companion video tutorial walks through the full construction of the medium-sized bag from start to finish, so you can follow along in real time before referencing the PDF for your chosen size's specific numbers. Once purchased, the pattern is yours to download and print as many times as you need, and you can make finished bags to sell or give as gifts. You can find the listing at shopcedarcompass.com or directly at shopcedarcompass.com, where it is priced accessibly to make quality beginner instruction available without a large upfront cost.
Key Takeaways
- A mesh market tote uses a simple chain-space stitch repeat that beginners learn quickly and that creates natural stretch for carrying groceries or produce.
- 100% cotton yarn in worsted or DK weight is the best material choice for durability, washability, and shape retention under load.
- A three-size pattern (small, medium, large) lets you match the bag to its use — produce bag, single-person grocery run, or full family haul.
- Keeping chain loops loose and even is the single most important tension skill for a well-functioning mesh tote.
- A video tutorial paired with a written PDF is the fastest learning path for beginners because it shows stitch motion and mid-construction appearance that text cannot convey.
- Blocking a finished cotton tote by wet-pinning it to size dramatically improves the look and evenness of the open mesh structure.
- The Craftuary Mesh Market Tote PDF pattern includes all three sizes and a companion video tutorial as an instant digital download.