How to Crochet a Granny Square Market Tote Bag: Complete Guide to the Beach Bag PDF Pattern

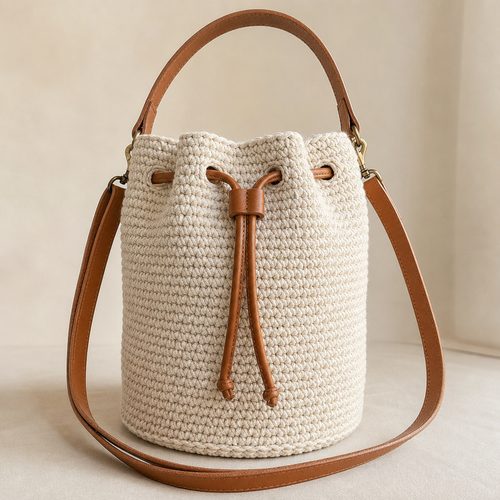
Coastal Bucket Bag Crochet Pattern, $4.99. Instant download, A4 and US Letter.
See the pattern
How do I crochet a granny square market tote bag for the beach?
What Makes a Granny Square Market Tote the Perfect Beach Bag
A granny square market tote combines two timeless crochet traditions — the iconic granny square motif and the open-weave market bag silhouette — into one functional, stylish accessory that's ideal for beach trips, farmers markets, and everyday errands. The open mesh structure created by joining multiple granny squares allows wet swimsuits, sandy towels, and fresh produce to breathe, preventing the trapped moisture and odor that solid-fabric bags develop. Because the bag is constructed from individual motifs rather than worked in the round as a single piece, even beginner-to-intermediate crocheters can complete it in manageable sessions, finishing one square at a time. The classic granny square aesthetic also means the finished bag pairs effortlessly with casual summer outfits, and the customizable color palette lets crafters match their personal style. Whether you fill it with sunscreen and a paperback novel or load it up with vegetables from the market, this style of tote holds its shape remarkably well thanks to the rigid geometry of the joined squares.
Materials and Hook Size You'll Need Before You Start
For a sturdy, washable market tote, cotton yarn in a worsted or DK weight is the top choice — it holds structure, dries quickly, and softens beautifully with washing, which matters a great deal for a bag destined for beach or market use. A size 5.0 mm (H/8) or 5.5 mm (I/9) crochet hook works well with most worsted-weight cottons, producing squares that are tight enough to retain shape without being so dense they lose the airy, market-bag feel. You'll want approximately 200–350 yards of your main color and 50–100 yards each of any accent colors depending on how many granny squares your chosen size calls for — the Craftuary PDF pattern includes a precise yardage chart broken down by bag size option. In addition to yarn and a hook, gather a yarn needle for weaving in ends and joining squares, a pair of scissors, and optional stitch markers to keep track of rounds within each motif. Blocking mats and rust-proof pins are helpful for squaring up your granny squares before assembly, ensuring the finished bag lies flat and the joins align neatly.
How to Crochet the Granny Square Motifs Step by Step
Each traditional granny square begins with a magic ring or a chain-4 joined into a ring, followed by three double crochets clustered together with chain-2 corner spaces — this foundation round establishes the square's center and its four directional corners. On subsequent rounds, you'll work clusters of three double crochets into each chain-2 corner space and one cluster into each chain-1 space along the sides, with the corner spaces growing outward each round to maintain the flat, square geometry. A standard granny square for a market tote typically measures 4–6 inches per side when worked to 4–5 rounds, and the Craftuary PDF pattern specifies the exact round count and gauge swatch dimensions needed to hit the target finished bag measurements. Tension consistency across all your squares is critical — if your squares vary in size, the joins will pucker or create gaps, so blocking each finished square before assembly is strongly recommended. Changing colors between rounds is where you can make the bag uniquely yours: finish the last stitch of a round, cut the old color, and join the new one in any corner chain-2 space for a clean, seamless color transition.
Joining Granny Squares to Build the Bag Body
The flat join method — also called the slip-stitch join or the flat slip-stitch seam — is the most popular technique for market totes because it creates a subtle ridge on the wrong side while keeping the right side smooth and visually clean. To join two squares, hold them with right sides facing each other, insert your hook through the back loops of both corresponding edge stitches simultaneously, and work a slip stitch through all layers; repeat across the entire shared edge for a secure, flexible seam. For a standard tote, you'll arrange your squares in a grid (for example, four squares wide by eight squares tall for a flat panel), join them into rows first, then join the rows together, and finally seam the two short sides to form the bag's tube shape. The bottom of the bag can be closed with a simple whipstitch seam across the bottom edge, or you can work a row of single crochet across the bottom opening and then fold and seam it for extra durability — the PDF pattern walks through both options with diagrams. Once the body is assembled, lay it flat on a blocking mat and mist lightly with water to open up the joins and let the finished shape settle before attaching the handles.
Crocheting and Attaching the Bag Handles
Handles for a granny square market tote are most commonly worked as long, narrow chains of single or double crochet rows — a strip approximately 1–1.5 inches wide and 20–24 inches long gives a comfortable over-the-shoulder or elbow-carry length for most adult wearers. To add structural integrity and prevent the handles from stretching under heavy loads, many crocheters work three to four rows of single crochet and then fold the strip in half lengthwise, slip-stitching the long edges together to create a doubled, cord-like handle that won't deform over time. Attach each handle by threading the ends through the top edge of the bag body at measured, symmetrical positions — typically lining up with the second and third square columns on each side — and stitching them securely in place with a yarn needle using a box stitch or X-stitch for maximum holding power. If you prefer chunky, rope-style handles for a more bohemian beach aesthetic, twisted cords made from doubled strands of your main yarn are a beautiful alternative that the Craftuary PDF pattern includes instructions for as a bonus variation. Always reinforce handle attachment points with several passes of the yarn needle, since this is the highest-stress area of any tote bag and the quality of this step determines how many seasons the bag will last.
Finishing, Blocking, and Care Tips for Your Finished Tote
After handles are attached, weave in all remaining yarn ends securely using a yarn needle — work each tail in two directions (first one way, then double back the opposite direction) through the back of the stitches to prevent them from working loose with repeated use and washing. Give the finished bag a final wet block by submerging it briefly in cool water, gently pressing out excess moisture in a towel, and then reshaping it on a flat surface to your target dimensions before allowing it to air dry completely, which typically takes 12–24 hours depending on the yarn fiber content. For ongoing care, cotton yarn totes like this one are generally machine washable on a gentle cycle in a mesh laundry bag — always check the yarn label for fiber-specific guidance, but cotton holds up exceptionally well to regular washing, which is a major practical advantage for a bag that sees beach and market use. If the bag loses shape slightly after many washes, a quick re-blocking restores the crisp square motif geometry in minutes. Store the bag loosely folded or hung — never compressed under heavy items — to maintain the open mesh structure between uses.
Download the Granny Square Market Tote PDF Pattern from Craftuary
The complete Granny Square Market Tote Beach Bag PDF pattern is available as an instant digital download from Craftuary, priced at $5.85 and accessible immediately after purchase — no waiting for shipping, no physical materials required. The pattern file is formatted as a clearly laid-out PDF with written stitch-by-stitch instructions, a materials list with specific yarn and hook recommendations, a gauge swatch guide, step-by-step assembly diagrams, and two size variations (a smaller day-market size and a larger beach-bag size) so you can choose the right fit for your project. Craftuary patterns are designed with both clarity and completeness in mind, meaning the file contains everything you need from first chain stitch to final handle attachment without requiring supplementary tutorials or guesswork. Because it's a PDF, you can print it, view it on a tablet next to your work, or load it on your phone — whatever workflow suits your crafting style. Visit the Craftuary shop at shopcedarcompass.com to download this pattern and browse the full collection of premium digital craft downloads across every category.
Key Takeaways
- A granny square market tote bag is built by joining individual 4–6 inch cranny square motifs in a grid, then seaming the panel into a tube and closing the bottom.
- Worsted-weight cotton yarn with a 5.0–5.5 mm hook is the best material choice for a durable, washable beach or market tote.
- The flat slip-stitch join method creates clean seams between squares with a smooth right-side appearance.
- Doubled-strip or twisted-cord handles, attached with a box stitch for reinforcement, prevent stretching under load.
- Blocking each granny square before assembly and wet-blocking the finished bag ensures even joins and a professional shape.
- The Craftuary PDF pattern includes two size options, full diagrams, and an instant download for $5.85 at shopcedarcompass.com.
- Cotton totes are machine washable on gentle and can be re-blocked after washing to restore their shape.