How to Crochet a Loaf Cat Plushie: Complete Beginner's Guide (8-in-1 Pattern Bundle)

Crocheting from someone else's pattern? Check its stitch counts free before you start.
How do I crochet a loaf cat plushie as a beginner?
What Is a Loaf Cat and Why It Makes the Perfect Beginner Crochet Project
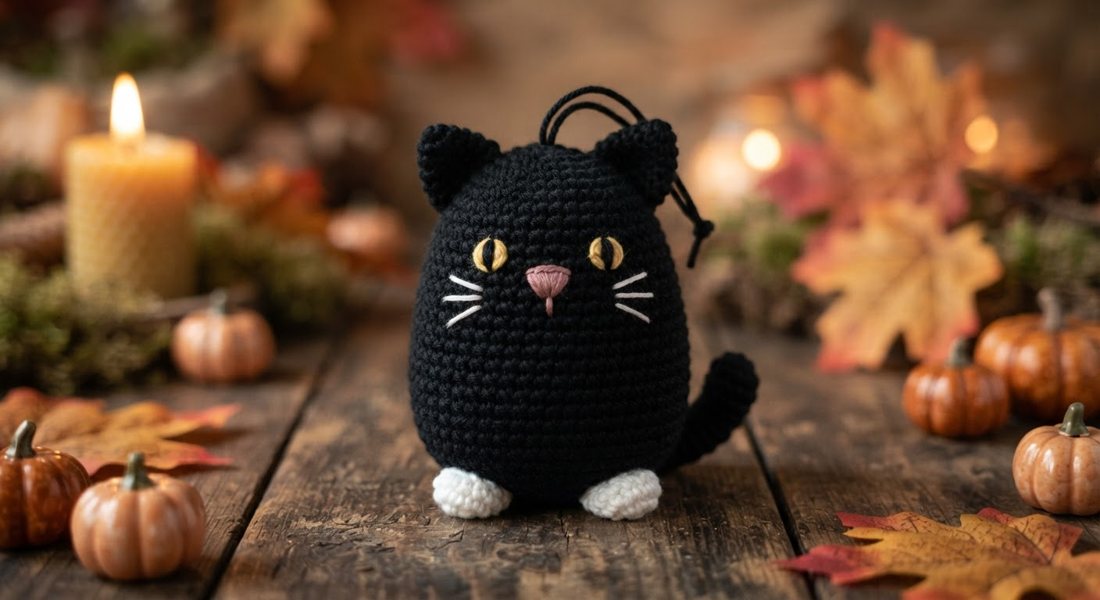
A 'loaf cat' refers to the iconic pose where a cat tucks all four paws neatly underneath its body, forming a compact, bread-loaf shape — and it has become one of the most beloved cat memes on the internet. Because of that simplified silhouette, the loaf pose is actually ideal for beginner crocheters: there are no dangling limbs to attach, the body is worked in a single rounded or rectangular mass, and the overall stitch count stays manageable for someone still building tension consistency. Unlike a fully posed amigurumi cat that requires you to stuff and sew four separate legs, ears, a tail, and a head, the loaf cat condenses most of the structure into one main piece, which dramatically reduces seaming errors. An 8-in-1 bundle pattern set expands on this foundation by giving you eight distinct loaf cat designs — different ear shapes, facial expressions, color layouts, and size options — so a single purchase grows with your skill level rather than leaving you with only one finished look.
Materials You'll Need Before You Start
For a standard loaf cat plushie measuring roughly 4–6 inches in length, you'll need worsted-weight (size 4) yarn in your chosen base color plus small amounts of a contrasting color for facial features, a 3.5mm or 4.0mm crochet hook, polyester fiberfill stuffing, a yarn needle for weaving in ends, and safety eyes in 6mm or 9mm depending on the look you want. If you plan to give the finished plushie to a child under three, substitute safety eyes with embroidered French knots or satin-stitch eyes using black yarn, since safety eyes have a small backing piece that can become a choking hazard. Premium acrylic blends work well because they hold their shape after stuffing and are machine-washable, making the finished plushie practical as well as decorative. Stitch markers are not strictly required but become very useful when you're working continuous rounds, because the loaf body is typically crocheted in a spiral and it's easy to lose your place without a marker clipped to the first stitch of each round. Total yarn usage for one loaf cat is usually under 50 grams, which means most stash yarn or a single skein covers the main body with material to spare.
Essential Stitches and Abbreviations Used in Loaf Cat Patterns
The vast majority of loaf cat plushie patterns — including the ones in an 8-in-1 beginner bundle — rely on just five core stitches: magic ring (MR), single crochet (sc), increase (inc, which is two single crochets in the same stitch), invisible decrease (invdec, also called sc2tog), and slip stitch (sl st). The magic ring is how you begin working in the round without leaving a hole at the center of your starting circle; if you find it slippery at first, you can substitute a chain-4 ring and cinch it closed, though the magic ring gives a cleaner finish. Increases and decreases are the two mechanisms that shape your loaf body: you increase stitches to make rounds grow wider, hold steady at a consistent count to build the flat sides, then decrease to close the piece before stuffing. The invisible decrease is preferred over a standard sc2tog in amigurumi work because it lies flat and doesn't create a visible 'V' pucker on the outside of the plushie. Once you can confidently execute these five stitches, the written row-by-row instructions in a well-written PDF pattern will carry you through the rest of the construction without requiring any advanced techniques.
Step-by-Step Overview: Crocheting the Loaf Cat Body
Begin with a magic ring and single crochet 6 stitches into it to create your starting circle — this becomes the base of the loaf cat's face or the top of its body depending on which construction method the specific pattern uses. From that 6-stitch ring, the pattern will walk you through a series of increase rounds that grow the piece outward (for example: Round 2 is 12 sc via 6 increases, Round 3 alternates one sc and one increase for 18 total stitches, and so on) until the piece reaches the desired width. Once you hit the target circumference, the pattern shifts into even rounds — no increases or decreases — for the straight body section that forms the 'loaf' depth from front to back. The narrowing phase uses the invisible decrease in a mirror of the increase sequence, pulling the edges back in until the opening is small enough to stuff firmly with fiberfill and then close completely with a final decrease round or a simple seam. Stuffing technique matters: fill the piece incrementally as you decrease rather than all at once at the end, so you can achieve an evenly firm shape without lumps or gaps near the closure.
Crocheting the Ears, Face, and Details
Most loaf cat ears are tiny triangles worked flat in just 3–5 rows: chain 2, single crochet into the second chain from the hook, then work short rows with increases at the center peak until the ear reaches the right height, finish with a slip stitch border and leave a long tail for sewing. Positioning the ears correctly is what gives each loaf cat its personality — ears set wide apart on a rounded head look startled or kitten-like, while ears placed closer together toward the crown look sleepy and relaxed, which is the classic loaf expression. For the face, attach your safety eyes between Rounds 3 and 4 (counting from the front of the head) with approximately 4–6 stitches of separation, then use a yarn needle and black yarn to embroider a small upside-down triangle for the nose and two short curved lines for the mouth. Cheek blush is optional but adds a lot of warmth to the finished piece: a few strokes of a pink or peach cosmetics blush applied with a small makeup brush after the plushie is complete gives a subtle rosy effect that photographs beautifully. The 8-in-1 bundle format is particularly useful here because it provides multiple facial expression templates — closed sleepy eyes, wide open eyes, winking variations — so you can mix and match heads and body sizes across the eight patterns to produce a whole family of loaf cats with distinct characters.
Finishing, Weaving Ends, and Common Beginner Mistakes to Avoid
After closing your last round, thread the tail onto your yarn needle and weave it through the back loops of the adjacent stitches in a figure-eight pattern for at least 1 inch before trimming; this prevents the closure from unraveling under the pressure of stuffing. The single most common beginner mistake in loaf cat plushies is under-stuffing: the finished piece looks correct until you sew the ears on and realize the body collapses slightly under its own weight, leaving the cat looking deflated rather than plump. Aim for a firmness where the plushie springs back when you press it lightly — almost like a stress ball — without the yarn stitches stretching visibly to show the stuffing beneath. Loose tension throughout the body is the underlying cause of visible stuffing; if this is a recurring issue, try dropping down half a hook size (for example, from 4.0mm to 3.5mm) so the fabric closes more tightly between stitches. Once all pieces are attached and all tails are woven in, give the finished loaf cat a gentle hand-wash in cool water with a drop of gentle detergent, reshape it while damp, and allow it to air-dry fully before gifting or displaying — this relaxes any uneven tension and leaves the surface looking polished.
Where to Get the 8-in-1 Loaf Cat Crochet Pattern PDF
The Craftuary 8-in-1 Loaf Cat Crochet Pattern Bundle is available as an instant digital download at shopcedarcompass.com, priced at $4.95 — making it one of the most cost-effective ways to get eight complete beginner-friendly plushie patterns in a single purchase. Each pattern in the bundle is delivered as a clearly formatted PDF with stitch-by-stitch written instructions, stitch counts listed at the end of every round, a materials list, and tips specific to that design variant, so you're never left guessing what comes next. Because the file is a digital download, you receive it immediately after purchase with no shipping wait, and you can print it at home or work directly from your device. The bundle format means you're effectively paying roughly 62 cents per individual pattern, compared to $2–$5 for a single amigurumi pattern purchased separately on most craft marketplaces. Craftuary designs its patterns with beginner accessibility as a first priority, which means the language is plain, the abbreviations are defined within the document, and the stitch counts are double-checked so you won't hit a rounding error mid-project.
Key Takeaways
- A loaf cat plushie is ideal for beginners because its tucked-paw pose eliminates the need to crochet and attach separate limbs, reducing complexity and seaming.
- The five stitches you need are: magic ring, single crochet, increase, invisible decrease, and slip stitch — no advanced techniques required.
- Use worsted-weight yarn and a 3.5–4.0mm hook; drop half a hook size if your stitches look loose enough to show the stuffing.
- Stuff incrementally as you work the decrease rounds, not all at once at the end, to achieve an even and plump loaf shape.
- An 8-in-1 bundle gives you eight design variations (expressions, ear styles, sizes) for about $4.95 total — roughly 62 cents per pattern.
- For gifts to children under three, replace safety eyes with embroidered satin-stitch eyes to eliminate choking hazard.
- Weave ends in a figure-eight pattern through at least 1 inch of stitches to prevent the closure from popping open under stuffing pressure.
- A gentle hand-wash and reshape while damp after completion evens out tension and gives the finished plushie a polished, professional appearance.