How to Sew a Halter Neck Fit and Flare Midi Dress: Complete Step-by-Step Guide

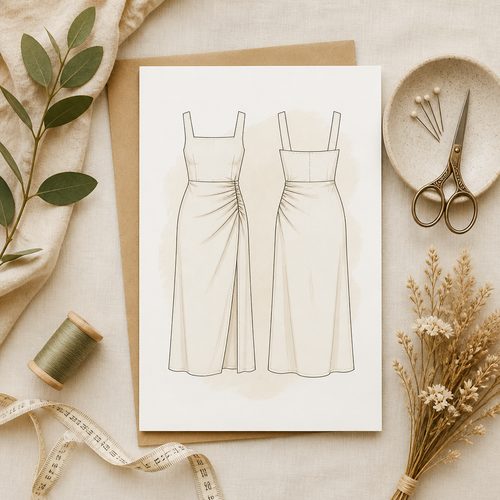
Midi Dress Sewing Pattern, $4.99. Instant download, A4 and US Letter.
See the pattern
How do you sew a halter neck fit and flare midi dress at home?
What Is a Halter Neck Fit and Flare Midi Dress?
A halter neck fit and flare midi dress is defined by three design elements working in concert. The halter neckline loops or ties behind the neck, leaving the shoulders and upper back exposed — a detail that creates an open, breezy silhouette ideal for warm weather. The fit-and-flare structure means the bodice is cut close to the chest and waist before releasing into a fuller, swinging skirt, adding movement and visual drama with every step. Midi length typically falls between the knee and the ankle, landing around mid-calf, which makes the style versatile enough for a casual afternoon outdoors or a summer celebration. Together, these elements create a sundress silhouette that is both figure-flattering on a wide range of body types and enduringly popular as a sewing project for intermediate home sewists.
Choosing the Best Fabric for This Style
The most successful halter neck midi dresses are made from lightweight, drapey fabrics that can move freely in the flared skirt while still supporting the structured shape of the bodice. Cotton lawn, rayon challis, linen-cotton blends, and lightweight chambray are all excellent choices for a casual sundress version of this style. Avoid stiff or heavy fabrics like canvas or thick denim, which fight the natural flare of the skirt and make the halter bodice feel rigid and uncomfortable to wear. If you want a dressier result, matte crepe, silk charmeuse, or a fluid georgette will elevate the look for special occasions. For beginners, a medium-weight quilting cotton or cotton poplin is the most forgiving option because it holds a pressed crease well, does not slip under the foot while sewing, and takes pins cleanly without distorting.
Tools and Supplies You Will Need
Gathering your full supply list before starting saves you significant time and frustration mid-project. You will need a sewing machine with a standard presser foot and either an invisible zipper foot or a regular zipper foot depending on your chosen closure, hand-sewing needles, sharp fabric scissors or a rotary cutter with a self-healing cutting mat, and tailor's chalk or washable fabric-marking pens for transferring pattern markings. Other essentials include a clear ruler, a seam ripper, and an iron with an ironing board for pressing every seam as you go — pressing is what separates a polished garment from a homemade-looking one. Depending on your specific pattern, you may also need fusible interfacing to stabilize the halter neckline, an invisible zipper or hook-and-eye closure, and approximately two to four yards of fabric based on your size and the fabric's width.
How to Take Accurate Measurements for a Fit-and-Flare Bodice
Accurate measurements are the single most important step in ensuring a flattering fit, particularly for a structured halter bodice. Take your bust at the fullest part of your chest with the tape measure parallel to the floor, then measure your natural waist at the narrowest point of your torso — typically one to two inches above the belly button — without pulling the tape snug. Record your high hip (three to four inches below the natural waist) and your full hip (seven to nine inches below the waist) as well, even though a fit-and-flare skirt is very forgiving through the hip area. For a midi dress you will also want your back waist length, measured from the base of your neck to your natural waist along the spine, and your desired finished skirt length measured from the waist down. When your measurements fall between two sizes on the pattern chart, always cut the larger size and take the seams in rather than cutting the smaller size and trying to add width.
Printing and Preparing Your PDF Sewing Pattern
A PDF sewing pattern like the Cedar and Compass Halter Neck Midi Dress pattern is delivered as an instant digital download, so you can begin sewing within minutes of purchase at shopcedarcompass.com. Print the pattern file at exactly 100 percent scale — do not select fit-to-page or shrink-to-fit in your printer dialog — then verify accuracy by measuring the test square printed on the first page against the stated dimension. Tape the pages together carefully along the crop marks, matching the alignment symbols precisely so pattern pieces are continuous and undistorted. If you plan to make the dress in multiple sizes over time, trace the relevant size lines onto tracing paper before cutting so you preserve the original printed sheet intact. Many premium PDF patterns, including this one, also include a large-format A0 or projector file so sewists who own a projector can skip printing entirely and trace directly onto fabric.
Cutting Out Your Fabric the Right Way
Pre-wash and press your fabric before cutting to account for any shrinkage that would otherwise distort the finished dress. Lay your fabric on a flat, hard surface folded selvage to selvage, then pin or weight your pattern pieces in place following the grain line arrows printed on each piece — cutting even slightly off-grain will cause the dress to twist at the body or pull uncomfortably when worn. The halter bodice front is typically cut on the fold to produce one seamless, symmetrical piece, while back bodice sections, ties, and skirt panels are cut as separate pieces. Mark all notches, darts, and balance points with tailor's chalk or small snips into the seam allowance before lifting the pattern pieces away from the fabric. Cut with smooth, continuous strokes rather than short choppy cuts to keep edges clean and seam matching accurate.
Constructing the Halter Neck Bodice
The halter bodice is the most technically involved section of this project, and a slow, methodical approach yields professional results. Begin by sewing any darts in the bodice front — these triangular tucks create the fitted curve through the bust — and press them downward toward the waist with a ham or rolled towel underneath to maintain the curve. Sew the bodice lining or facing to the outer bodice along the neckline and armhole edges with right sides together, clip curves every half inch so the edge will lie flat when turned, then understitch the lining close to the seam line to prevent it from rolling to the outside during wear. Make the halter ties by folding long fabric strips in half lengthwise and sewing along the long edge and one short end, then turning them right-side-out and pressing flat — a loop turner or safety pin threaded through the tube makes turning straightforward. Install any back closure such as an invisible zipper or button loop while the bodice back is still a flat piece of fabric, as it is far easier to handle before the side seams are sewn closed.
Building the Fit-and-Flare Skirt
The skirt creates the signature flare through multiple panels, godets, or a circular or semi-circular cut, each of which should be sewn together along vertical seams with right sides facing and seams pressed open for the flattest possible finish. Work from the center front seam toward the back, pinning each panel at the top, bottom, and midpoint before sewing to distribute any ease evenly and prevent waviness at the hem. After the skirt panels are assembled, hang the completed skirt from a hanger or dress form for a full 24 hours before marking the hem — bias-influenced or flared cuts will drop due to gravity, and hemming before this rest results in an uneven finished hem. Mark the hemline at a consistent height from the floor all the way around using a hem marker or a partner holding a rigid ruler, then finish with either a narrow machine-stitched hem or a hand-sewn blind stitch for the most invisible result. A serged or Hong-Kong-finished raw edge before hemming keeps the inside of your dress looking as polished as the outside.
Joining the Bodice and Skirt at the Waistline
With both the bodice and skirt complete as independent units, joining them at the waistline is one of the most satisfying steps in the construction process. Stay-stitch around the lower edge of the bodice and the upper edge of the skirt at three-eighths of an inch to prevent the fabric from stretching out of shape while you handle them, then pin the two pieces together at center front, center back, and side seams with right sides facing and all notches matched. Ease any remaining fullness evenly between the pins rather than clustering it in one area, and sew the seam with the skirt side facing up so you can see and guide any gathers or ease stitching. Press the completed waist seam upward toward the bodice and, if desired, topstitch close to the seam from the right side for a more structured waistline. Grade the seam allowances by trimming them to slightly different widths to reduce bulk, particularly if you are working with multiple fabric layers at the waist junction.
Fit Adjustments and Common Fixes
Even with careful measuring, small fit tweaks are a normal and expected part of garment sewing, not a sign that something went wrong. If the distance between the bust and waist feels too long on your body, take a small horizontal fold — called a waist tuck or fish-eye dart — across the torso to shorten that vertical length without touching the neckline or waistline shaping. If the halter ties create pressure at the back of the neck, lengthen them by an inch at the unfinished end before closing; if they are loose and the bodice gaps at the neckline, shorten them slightly. For sewists with a larger cup size, a full bust adjustment performed on the paper pattern piece adds circumference through the bust without widening the shoulder or altering the armhole. The fit-and-flare silhouette is notably forgiving through the hip and thigh because the skirt flares away from the body rather than following its contours, meaning hip adjustments are rarely necessary as long as the waist measurement is accurate.
Why the Cedar and Compass PDF Pattern Makes This Project Easier
Not all sewing patterns deliver the same experience, and the quality and format of a pattern has a measurable impact on how smoothly your project goes. The Cedar and Compass Halter Neck Midi Dress PDF sewing pattern, available at shopcedarcompass.com, is formatted with step-by-step illustrated instructions, clearly labeled notches and grain lines, and a multi-size layout covering a full range of sizes in a single file — so you can size up or down for future projects without purchasing again. At a price point of around $14, it sits at an accessible mid-market level that reflects the depth of included guidance, the professional layout, and the projector-compatible A0 file bundled alongside the standard letter-size print file. As a digital download, the pattern is available instantly after purchase: no shipping delay, no risk of a physical pattern arriving damaged, and the ability to reprint individual pages if a piece is miscut. Storing the file on your device means it is available for every future make of this style, and the clear sizing chart ensures you can return to it in different sizes across different seasons.
Key Takeaways
- A halter neck fit and flare midi dress combines a tie-back neckline, a fitted bodice, and a flared skirt falling to mid-calf
- Best fabrics are lightweight and drapey: cotton lawn, rayon challis, linen-cotton blends, or chambray
- Always print PDF patterns at exactly 100% scale and verify with the printed test square before cutting
- Take four essential measurements: bust, natural waist, high hip, and full hip
- Pre-wash fabric before cutting to prevent post-construction shrinkage that distorts the finished garment
- Hang completed flared skirts for 24 hours before marking the hem so bias-influenced fabric can relax fully
- Sew and fully finish the halter bodice — including lining, ties, and closure — before joining it to the skirt
- The fit-and-flare silhouette is forgiving through the hips, making it suitable for a wide range of body types
- PDF sewing patterns are instant downloads you can print unlimited times and store permanently on any device
- The Cedar and Compass pattern at shopcedarcompass.com includes a projector-ready A0 file alongside the standard printable format