Free pattern · Christmas ·
Crochet Christmas Deer: Free Fawn Amigurumi Pattern
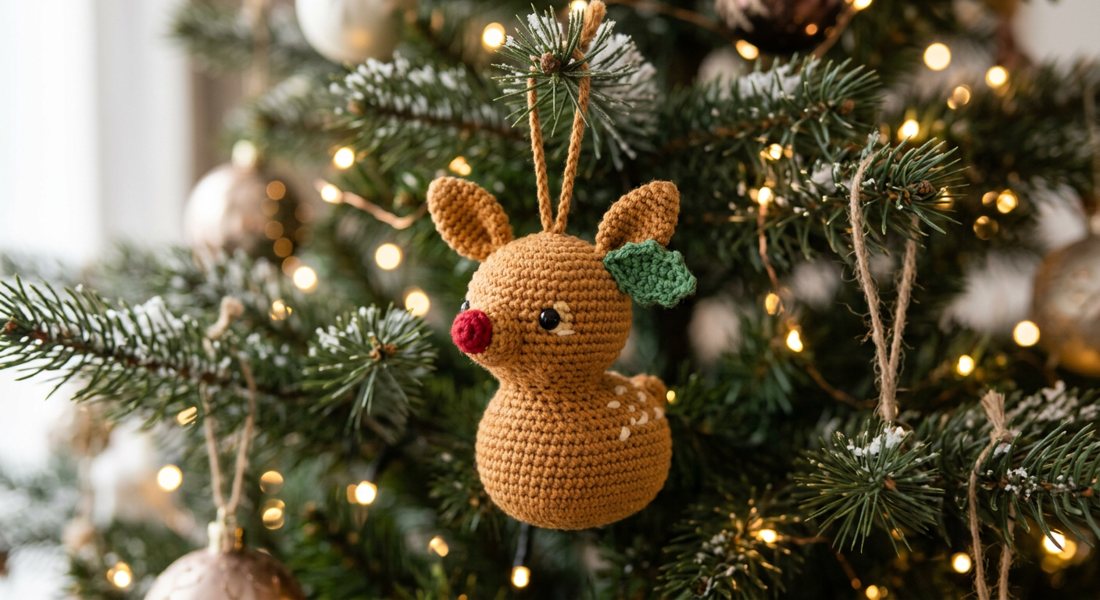
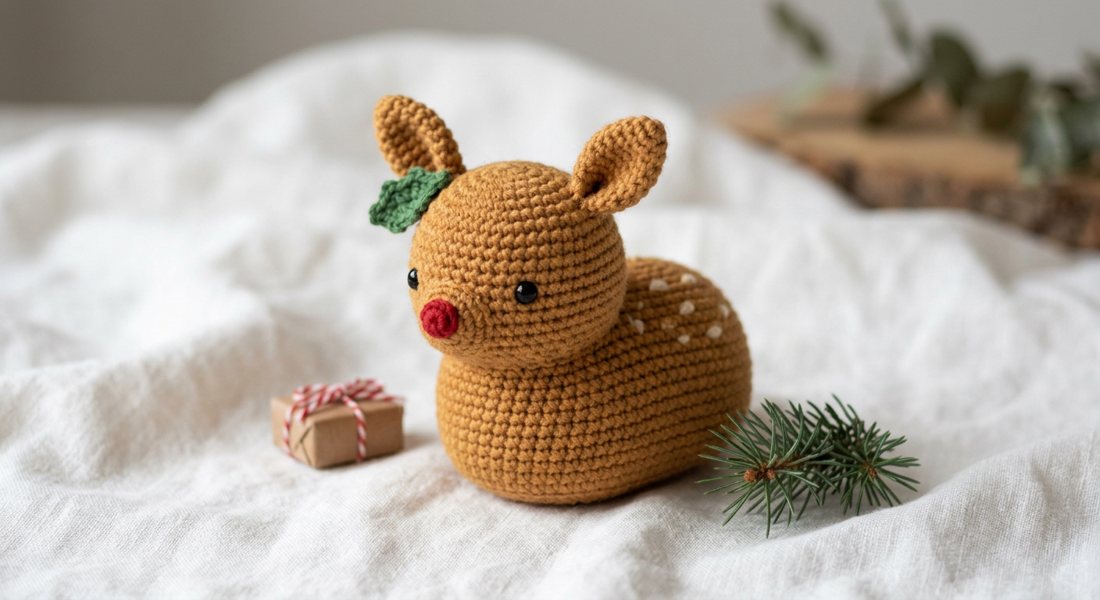
A small caramel crochet fawn sitting up: a pear-shaped body, a round head with a short muzzle and a red crocheted nose, two big upright ears, two embroidered eyes, cream spots on its back, a little tail and a green holly leaf beside one ear. This is a quick, beginner-friendly Christmas crochet pattern: 7 pieces worked in spiral rounds of single crochet, about 19 cm when it's finished. It's free with a Craftuary account.
| Finished size | about 19 cm |
|---|---|
| Yarn | Worsted weight |
| Hook | 3.5-4.0 mm |
| Level | Beginner |
| Time | about 1-3 hours |
| Rounds | 51, each with its stitch count |
| Price | Free |
Jump to the pattern Printable PDF (free) Save it on Pinterest
What you need
- Worsted weight (CYC 4). A (caramel) about 45 yd (41 m), C (red) about 5 yd (5 m), E (green) about 5 yd (5 m); B (black) small amount, D (cream) small amount
- Hook: 3.5-4.0 mm
- Stuffing, a stitch marker and a yarn needle
Shop the supplies
Worsted weight yarn3.5 mm crochet hookFiberfill stuffingStitch markersYarn needles
As an Amazon Associate, Craftuary earns from qualifying purchases. It costs you nothing extra and helps keep the free patterns free.
What you'll make
7 pieces (Body, Head, Muzzle, Nose, Ear, Tail, Leaf), 51 rounds in all, every round with its stitch count written at the end so you can check as you go.
Tips
- Work in continuous spiral rounds and move your stitch marker up every round.
- Count your stitches at the end of each round; the number in brackets is what you should have.
- Use a hook a size smaller than your yarn label suggests, so the stuffing doesn't show.
- These make lovely gift toppers and tree ornaments; add a hanging loop before you sew the last piece.
The free pattern
US crochet terms. The number at the end of each round is how many stitches you should have.
Size: about 19 cm (7.5 in) tall in worsted yarn (approximate; it depends on your tension)
Yarn: Worsted weight (CYC 4). A (caramel) about 45 yd (41 m), C (red) about 5 yd (5 m), E (green) about 5 yd (5 m); B (black) small amount, D (cream) small amount
Hook: 3.5-4.0 mm (smaller than the yarn label, for a tight fabric with no stuffing showing)
Notions: a little yarn for the embroidered details, fiberfill stuffing, stitch marker, yarn needle
ABBREVIATIONS (US terms): MR magic ring, sc single crochet, inc 2 sc in one stitch, dec single crochet 2 together (invisible decrease recommended), st(s) stitch(es), sl st slip stitch, FO fasten off, Rnd(s) round(s)
Notes: Worked in continuous spiral rounds; move your stitch marker up each round. The number in brackets is the stitch count at the end of the round.
PROPORTIONS: The head is smaller than the body on purpose. Sew it on firmly with many small stitches.
Body (make 1, colour A), about 6.7 cm (2.7 in) across at its widest
- Rnd 1 6 sc in MR 6
- Rnd 2 sc in each st around 6
- Rnd 3 inc in each st around 12
- Rnd 4 sc in each st around 12
- Rnd 5 (sc, inc) x 6 18
- Rnd 6 sc in each st around 18
- Rnd 7 (sc 2, inc) x 6 24
- Rnd 8 sc in each st around 24
- Rnd 9 (sc 3, inc) x 6 30
- Rnd 10 sc in each st around 30
- Rnd 11 (sc 4, inc) x 6 36
- Rnds 12-13 sc in each st around 36
- Rnd 14 (sc 4, dec) x 6 30
- Rnd 15 sc, dec, (sc 3, dec) x 5, sc 2 24
- Rnd 16 (sc 2, dec) x 6 18
Stuff firmly, and keep stuffing as you close.
- Rnd 17 (sc, dec) x 6 12
- Rnd 18 dec in each st around 6
FO, weave the tail through the front loops of the last 6 stitches and pull closed.
Head (make 1, colour A), about 5.6 cm (2.2 in) across at its widest
- Rnd 1 6 sc in MR 6
- Rnd 2 inc in each st around 12
- Rnd 3 (sc, inc) x 6 18
- Rnd 4 (sc 2, inc) x 6 24
- Rnd 5 sc, inc, (sc 3, inc) x 5, sc 2 30
- Rnds 6-9 sc in each st around 30
- Rnd 10 (sc 3, dec) x 6 24
- Rnd 11 sc, dec, (sc 2, dec) x 5, sc 18
Stuff firmly, and keep stuffing as you close.
- Rnd 12 (sc, dec) x 6 12
- Rnd 13 dec in each st around 6
FO, weave the tail through the front loops of the last 6 stitches and pull closed.
Muzzle (make 1, colour A), about 2.2 cm (0.9 in) across at its widest
- Rnd 1 6 sc in MR 6
- Rnd 2 inc in each st around 12
- Rnds 3-5 sc in each st around 12
FO, leaving a long tail for sewing.
Nose (make 1, colour C), about 1.5 cm (0.6 in) across at its widest
- Rnd 1 4 sc in MR 4
- Rnd 2 inc in each st around 8
FO, leaving a long tail for sewing.
Ear (make 2, colour A), about 2.2 cm (0.9 in) across at its widest
- Rnd 1 6 sc in MR 6
- Rnd 2 inc in each st around 12
- Rnds 3-5 sc in each st around 12
FO, leaving a long tail for sewing.
Tail (make 1, colour A), about 1.5 cm (0.6 in) across at its widest
- Rnd 1 4 sc in MR 4
- Rnd 2 sc in each st around 4
- Rnd 3 inc in each st around 8
- Rnds 4-5 sc in each st around 8
FO, leaving a long tail for sewing. Stuff lightly if you like.
Leaf (make 1, colour E), about 3.4 cm (1.3 in) across at its widest
- Rnd 1 6 sc in MR 6
- Rnd 2 inc in each st around 12
- Rnd 3 (sc, inc) x 6 18
Sl st in the next st to finish. FO, leaving a long tail.
Assembly
- Stuff the Body and the Head firmly before closing them, and leave a long tail of colour A. The Body starts at its narrow top (the point) and ends at its round bottom.
- Sew the head to the body between Rnds 6 and 7. On top of the body, over its narrow point, so the head covers the point.
- Sew the muzzle to the head between Rnds 7 and 9. Centred on the front, stuffed lightly, pointing forward.
- Sew the nose to the muzzle at Rnd 1. Fitted over the end of the muzzle, stuffed with a little fiberfill.
- Embroider the two eyes on the head at Rnd 6 with colour B. About 7 stitches apart, just above the muzzle, each with a tiny white highlight stitch.
- Embroider the eight small spots in a scattered pattern on the body around Rnds 8-13 with colour D. Scattered around the back and sides.
- Flatten the ears; do not stuff them.
- Sew the ears to the head between Rnds 3 and 4. Pinched flat at the base, one on each side of the top of the head, pointing up and out.
- Sew the tail to the body between Rnds 9 and 10. Centred on the back, pointing up.
- Sew the leaf to the head between Rnds 4 and 5. Pinch two opposite sides of the circle into points first so it is a holly leaf shape; sew it flat on the front of the head beside one ear.
- Optional, to hang it on the tree: thread a length of colour A through the top of the head and tie it into a hanging loop.
- Weave in all ends.
Want it on paper, or with pictures of every stage?
Free account: the printable PDF in US Letter and A4. Premium: a 3D build video of every round and a step-by-step picture guide.
Get the printable PDF free What premium adds →Questions
Is the Little Christmas Fawn crochet pattern free?
Yes. The Little Christmas Fawn pattern is free with a Craftuary account, as a US Letter and an A4 PDF.
What yarn and hook do I need for the Little Christmas Fawn?
Worsted weight yarn and a 3.5-4.0 mm hook, plus stuffing, a stitch marker and a yarn needle.
How big is the crochet little christmas fawn?
About 19 cm, depending on your yarn and tension.
Is the Little Christmas Fawn pattern good for beginners?
Yes. It uses single crochet, increases and decreases in spiral rounds, and every round ends with its stitch count so you can check as you go. Most makers finish it in about 1-3 hours.
Get it
The whole pattern is above, free to read. The printable PDF (US Letter and A4) is free with a Craftuary account. Premium members also get the 3D build video and a step-by-step picture guide.
The pictures are previews; your finished piece will vary with your yarn and tension.
Free Christmas crochet patternsFree amigurumi patterns
More free patterns
- Crochet Bao Bun Amigurumi: Easy Free Pattern (Steamed Bun)
- Halloween Black Cat Crochet Pattern: Small Free Amigurumi
- Crochet Owl Christmas Ornament: Free Amigurumi Pattern
- Crochet Christmas Penguin: Free Amigurumi Pattern
- Christmas Dog Crochet Pattern: Free Puppy Amigurumi
- Crochet Skeleton Amigurumi: Free Halloween Pattern