Free guide
Sewing basics, in pictures
Every sewing pattern assumes you know six things: seam allowance, notch marks, grainline, pressing, reading the size table, and how fabric width changes how much to buy. Here's each one in a picture and two sentences.
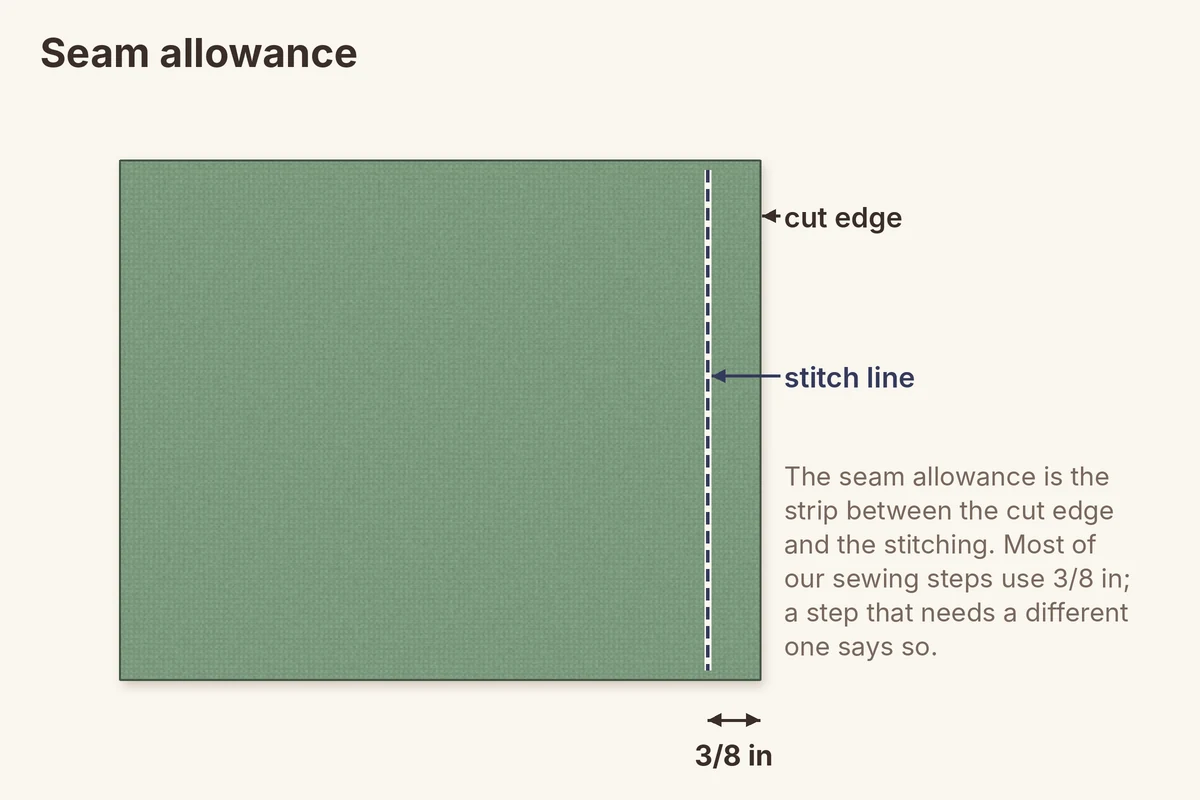
1Seam allowance
The strip between the cut edge and the stitching line. Most of our sewing patterns use 3/8 in (1 cm); a step that needs a different one says so. Sew with the fabric edge on your machine's 3/8 guide, not the needle.
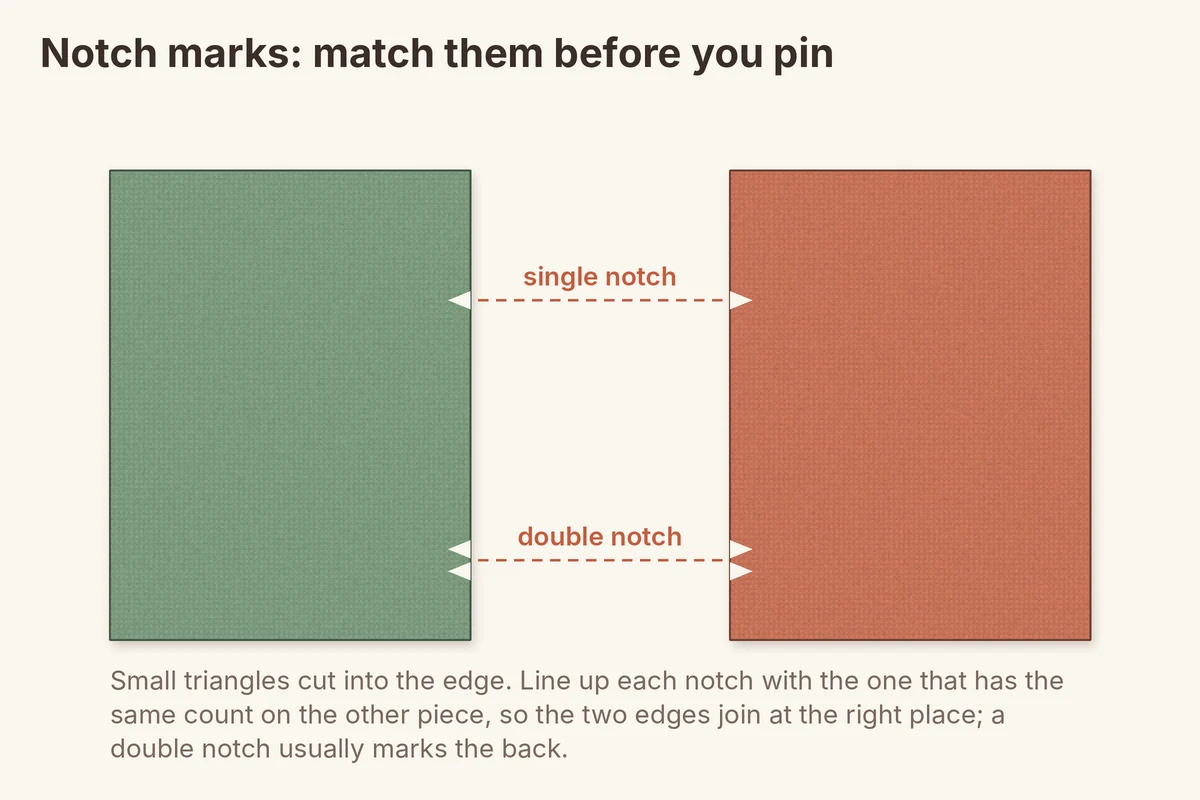
2Notch marks
Small triangles cut into the edge. Match each notch with the one that has the same count on the other piece before you pin: a single notch to a single, a double to a double (a double usually marks the back).
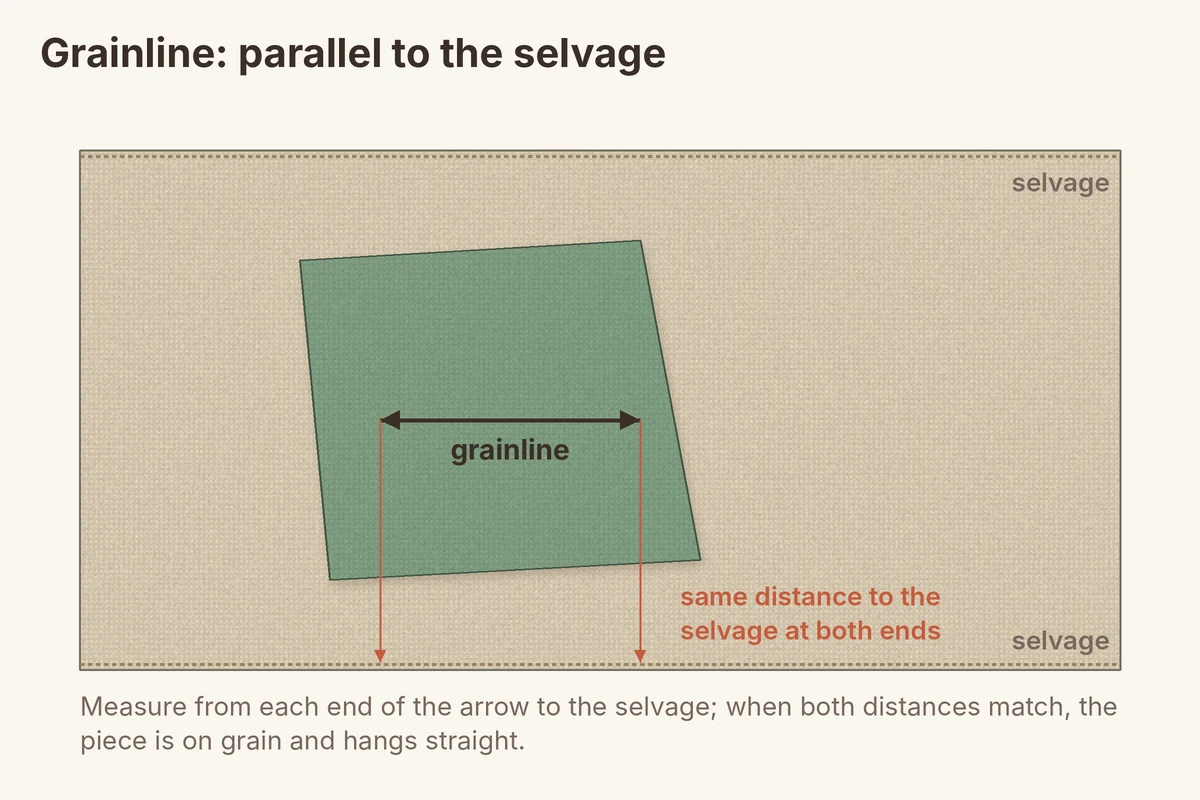
3Grainline
The arrow on a pattern piece goes parallel to the selvage. Measure from both ends of the arrow to the selvage; when the two distances match, the piece is on grain and will hang straight.
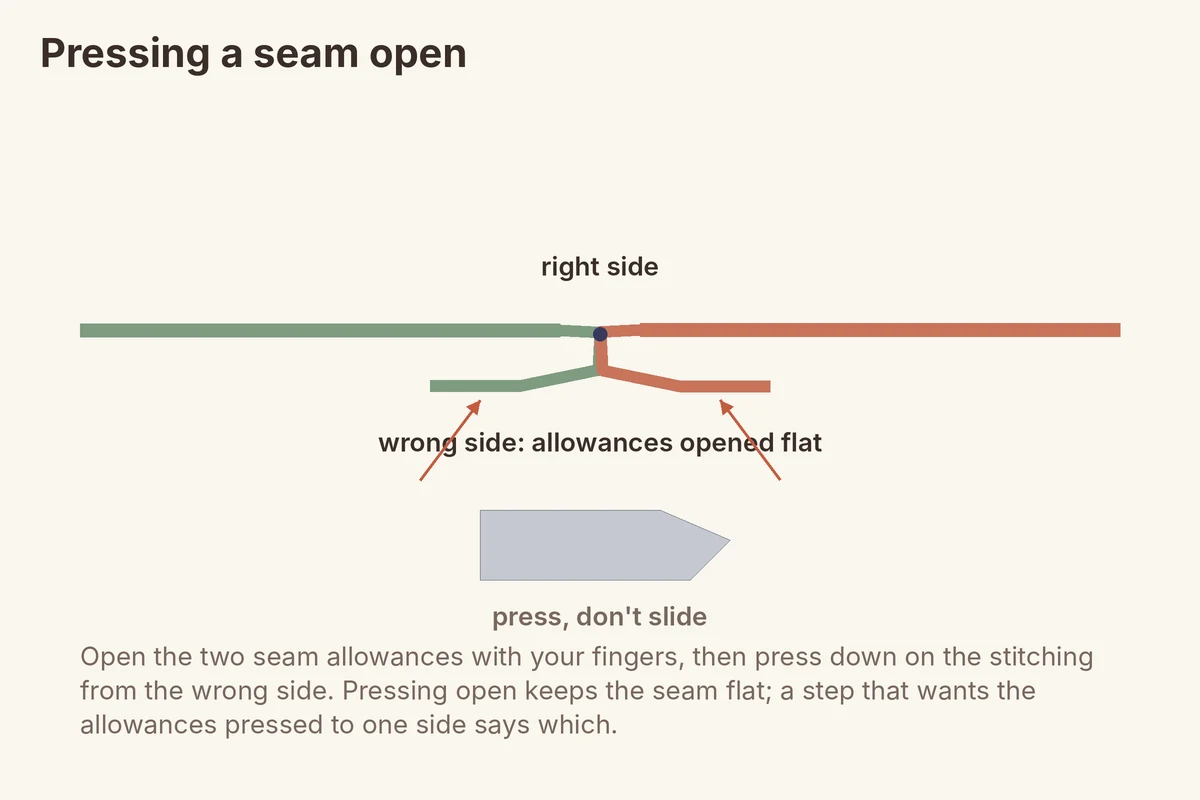
4Pressing a seam open
Open the two seam allowances with your fingers, then press down on the stitching from the wrong side. Lift and press; don't slide the iron, or the fabric stretches.
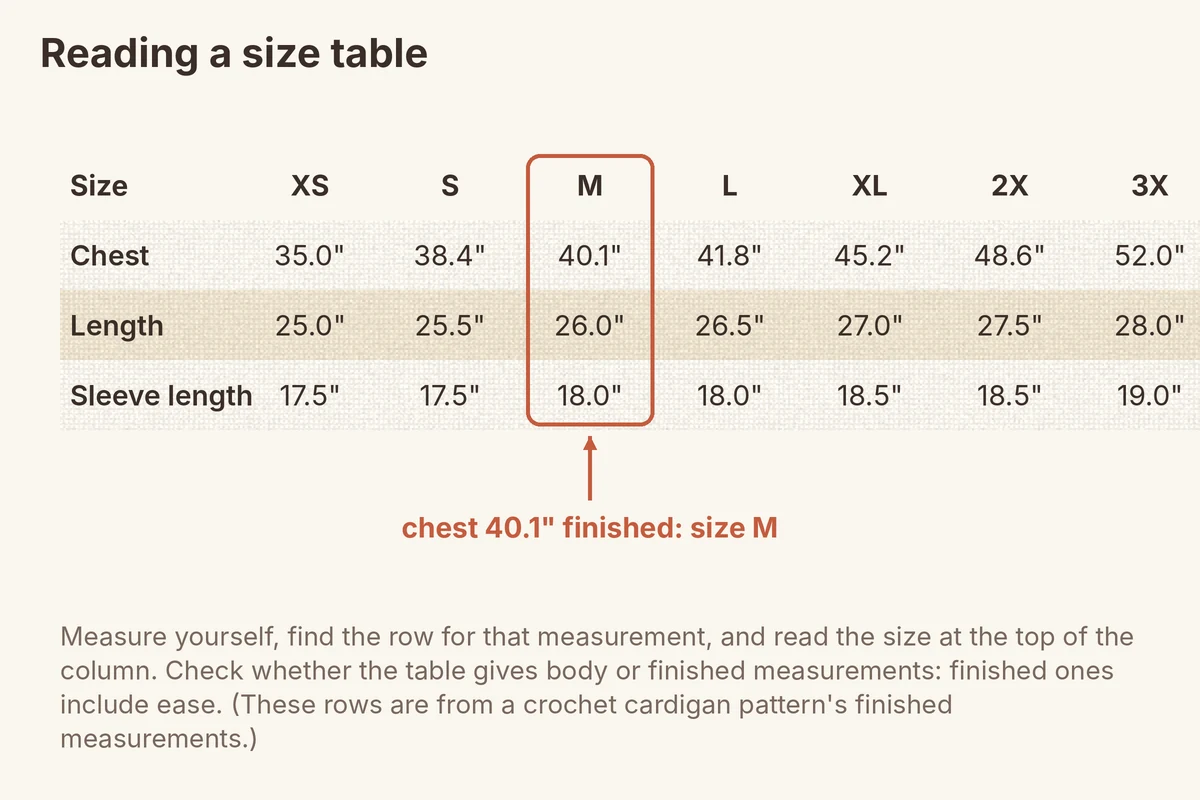
5Reading a size table
Measure yourself, find that number in the row, and read the size at the top of the column. Check whether the table gives body or finished measurements: finished ones include ease.
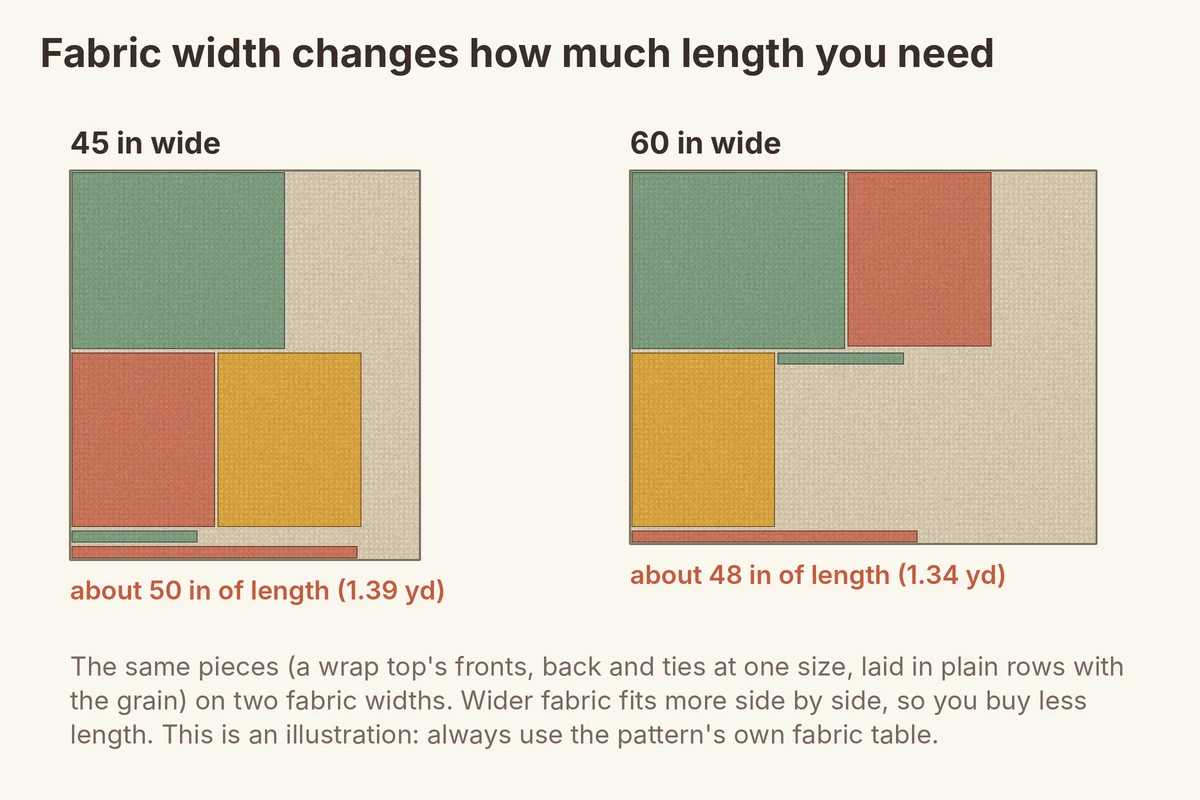
6Fabric width and how much to buy
The same pieces need less length on wider fabric, because more fit side by side. Always use the pattern's own fabric table for your width; this picture shows why the numbers differ.
Questions
What is a standard seam allowance?
Home sewing patterns usually use 5/8 in (1.5 cm) or 3/8 in (1 cm). Use the one the pattern states; Craftuary's sewing patterns use 3/8 in unless a step says otherwise.
Which way does the grainline go?
Parallel to the selvage, the finished edge of the fabric. Measure from both ends of the grainline arrow to the selvage and adjust until the two match.
Should I press seams open or to one side?
Open, unless the pattern says to one side. Seams that will be topstitched or enclosed are often pressed to one side.
More free tools